 |
 |
||||||
| 0 1 2 3 4 5 6 7 8 9 10 11 Download Zipped Tutorial | |||||||
|
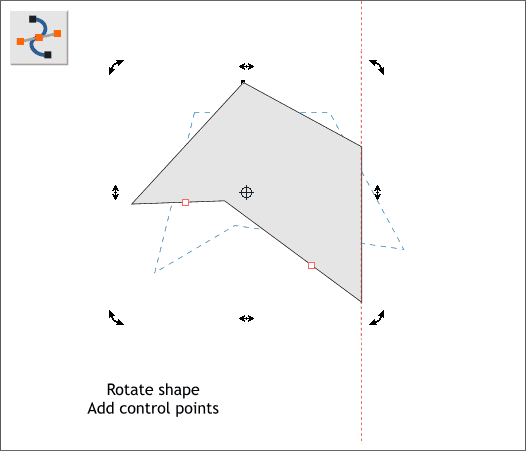
Click twice on the shape to enable rotate/skew mode. Rotate the shape so that the right side is vertical. Switch to the Shape Editor Tool (F4) and add two new control points as shown above.
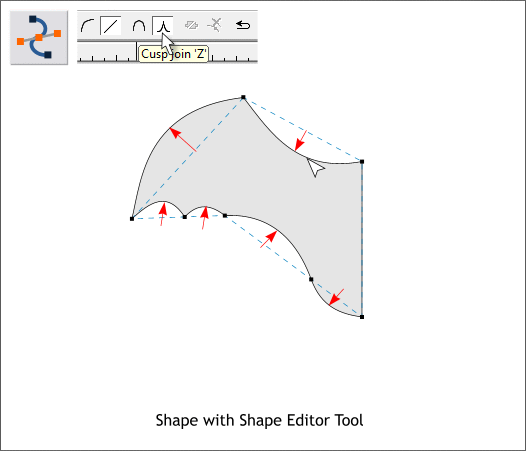
With the shape selected, drag the sides with the Shape Editor Tool to make a wing shape as shown above. Make sure the selected control points are set to Cusp Join. TIP: You can toggle a selected control point from Smooth Join to Cusp Join by pressing S for smooth and Z for cusp on your keyboard.
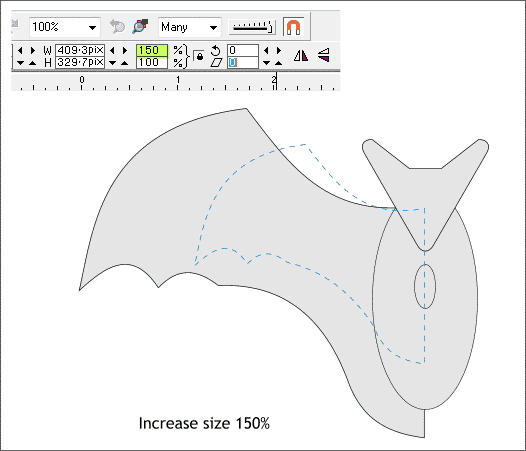
With the Lock Aspect Ratio (the black padlock icon) in the down (enabled) position, and with wing selected, enter 150 in either the Width or Height % text entry boxes and press Enter. Set the wing behind the body and head objects as shown. (Press Ctrl b for send to back).
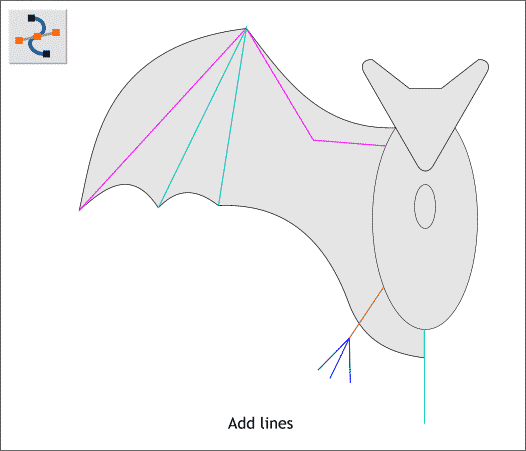
Using the Shape Editor Tool, and with Cusp Join option selected on the Infobar, draw a series of straight lines as shown above. Press the Esc key to end a line before starting a new line. The V-shaped line on the wing is one line.
|
|||||||
|
|
|||||||


