 Drag two guidelines from the screen rulers (
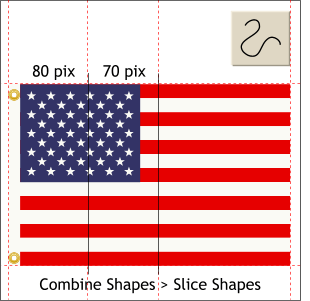
Window > Bars > Rulers or Ctrl L) and place the first 80 pixels from the left side of the flag and the second 70 pixels to the right, or 150 pixels from the left side of the flag. Drag two guidelines from the screen rulers (
Window > Bars > Rulers or Ctrl L) and place the first 80 pixels from the left side of the flag and the second 70 pixels to the right, or 150 pixels from the left side of the flag.
TIP: To make the rulers begin measuring from the top left portion of the
flag, drag the cross hair icon where the two on-screen rulers come together (Drag 0, 0, point) to the top left of the flag. This resets the 0, 0, point of the rulers. Using the Shape Editor Tool or the Pen Tool, draw two vertical lines that extend above and below the flag and are centered on the two guidelines.
Select the flag and Convert to Editable Shapes (Arrange menu). This is important for the next step to work properly. Select the first line, then the grouped flag elements and Combine Shapes >
Slice Shapes (Arrange menu). This cuts the flag into two parts. Repeat this process with the second line and the right portion of the flag. The trimmer lines
disappear and nothing looks different. But you should now have three separate flag sections. |

