 |
 |
||||||||
| 0 1 2 3 4 5 6 7 8 9 10 11 Download Zipped Tutorial | |||||||||
|
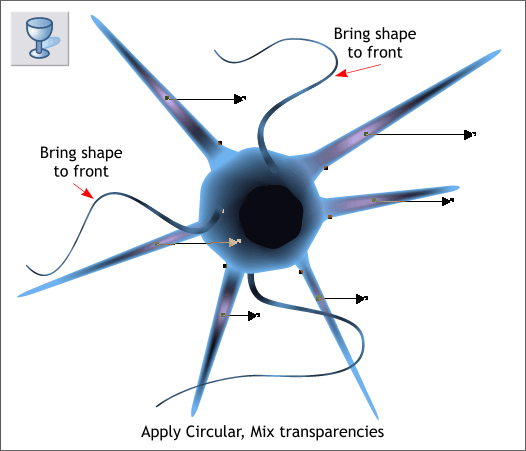
Select the Transparency Tool (F6). One-by-one, select the top spike shapes and apply Circular, Mix transparencies (Select Circular from the Transparency Shape drown list). Note the position of the center of the transparencies above. This creates a subtle glow inside the spike shapes. Select the left and top curved shapes and bring to the front (Ctrl f or Arrange > Bring to Front). This completes the neurone. Next we'll create some highlights to simulate neurone activity. But before we do, save your drawing and take a short break. TIP: It is not a bad idea when creating a complex drawing or document to save the file with two different names. While saving a minor change to this tutorial in Xtreme Pro 3.2, something hung and Xara crashed. When I tried to reopen the tutorial document, there was nothing there. The file size was 0 (zero)K. When I recreated the tutorial, I saved it with two different names, just in case. Also, you can use Dmitry Malutan's XXTune ulility found in the Xara Xone Shareware page to force Xtreme to make a *.BAK backup file whenever you save.
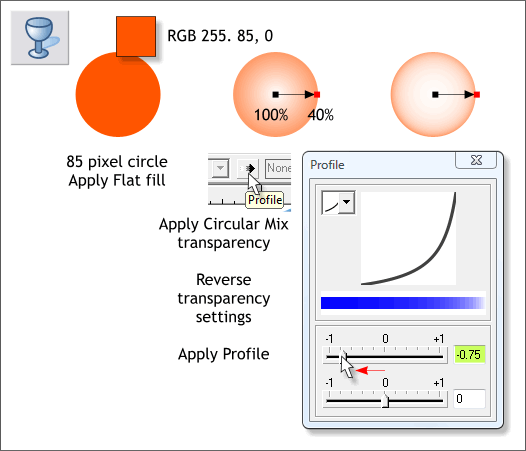
Create a circle to the size shown above and apply an orange fill. With the Transparency Tool (F6), apply a Circular, Mix transparency. Change the inside and outside transparency slider settings as shown in the center above so the inside value is 100% (totally transparency) and the outside is 40% (semi transparent). Click the Profile icon on the Infobar. In the Profile dialog, move the top slider to the left to -0.75 or key in -0.75 in the text entry box and press Enter.
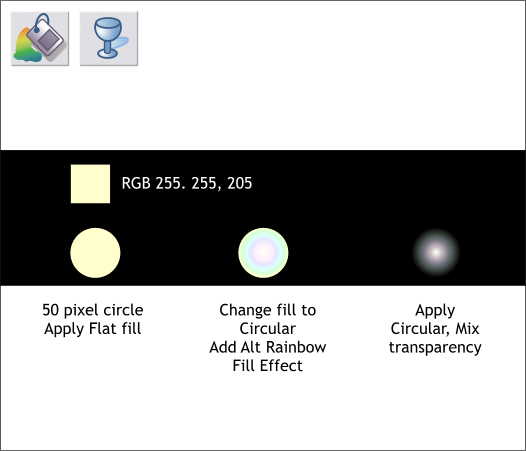
Create a smaller pale yellow circle to the size shown. Apply a Circular fill with the Fill Tool. From the Fill Effects drop down list, select Alt Rainbow. Switch to the Transparency Tool (F6). From the Transparency Shapes drop down list, select Circular. Leave all the other transparency settings as is.
|
|||||||||
|
|
|||||||||


