|
 Using the Ellipse Tool, hold down the Ctrl
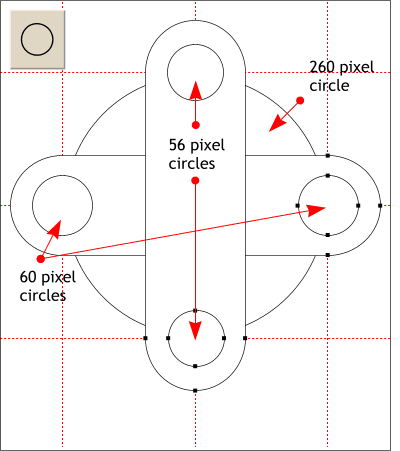
key to constrain the ellipse to a circle. Make a single 260 pixel circle, two 56 pixels circles, and two 60 pixel circles. Using the Ellipse Tool, hold down the Ctrl
key to constrain the ellipse to a circle. Make a single 260 pixel circle, two 56 pixels circles, and two 60 pixel circles.Convert the rounded rectangles and the circles to editable shapes (
Arrange > Convert to Editable Shapes). Select one of the rectangles with the Selector Tool, then select the Shape Editor Tool (to make the control points visible), and drag
guidelines from the screen rulers through the control points as shown. Drag guidelines through the control points on the other rounded rectangle. Select each of the circles with the Selector Tool first, then the
Shape Editor Tool and and align the circles control points to the guidelines. Use the arrow keys on your keyboard to move the circles. Or -- just align visually the circles.
TIP: To ensure the guidelines snap to the control points, click the red magnet icon
(Snap to Objects) on the Infobar at the top of the screen.HOW TO: To drag guidelines from the screen rulers (Window > Bars > Rulers or Ctrl L
), simply drag from the screen ruler onto the page without releasing the left mouse button until the guideline is in place. |

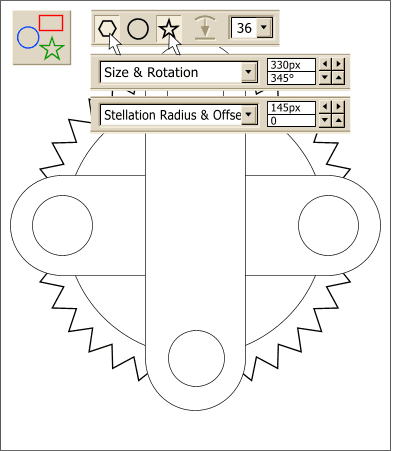 Using the QuickShapes Tool, drag a shape.
Don't worry about the size, but do hold down the Ctrl key to constrain it to even proportions.
Using the QuickShapes Tool, drag a shape.
Don't worry about the size, but do hold down the Ctrl key to constrain it to even proportions.