|

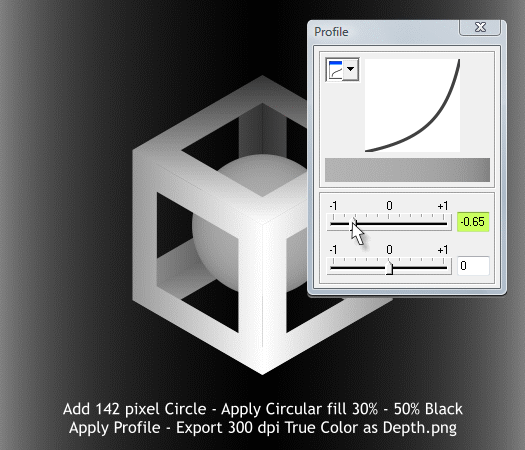
Select the Ellipse Tool (L), hold down the Ctrl key to constrain the ellipse to a circle and create a 142 pixel circle.
TIP: To create a rectangle or ellipse to an exact size, draw any size rectangle or ellipse, then enter the exact dimensions in the Width and Height
text entry boxes and press Enter.
Apply a Circular fill with the Fill Tool (F5) with the center of the fill 30% Black and the outside 50% Black. Press the Profile arrow icon on the Infobar
and adjust the top slider to -0.65. This is important for creating a realistic circle in our stereogram.
Group the grayscale images then center align over the background.
Export as a PNG, True Color, 300dpi to the Desktop. Name the image Depth.png.
NOTE: The color image and the depth image have to be exactly the same size. If they are not you will get an error message in Stereogram Generator
and will not be able to create a Mapped Image Stereogram. Make sure that both rectangles do not have an outline and that both rectangles are exactly the same size in even pixel amounts.

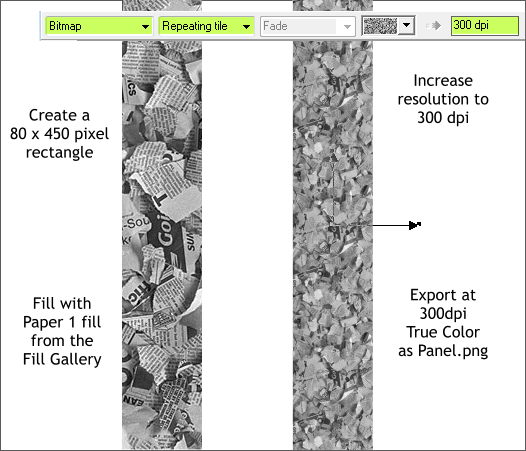
Create a tall thin rectangle 80 pixels wide by 450 pixels tall.
Open the Fill Gallery (Shift F11). Select the rectangle. Select the Paper 1 fill in the Miscellaneous Fills folder. Press Fill to apply the fill to the rectangle.
Switch to the Fill Tool (F5). Click on the rectangle. On the Infobar change the Bitmap Resolution to 300dpi and press Enter to apply the change.
Export the rectangle (with no outline) to the desktop as Panel.png, 300dpi and True Color.
We are now ready to create the stereogram.

If you have not already done so, download and install Stereogram Suite.
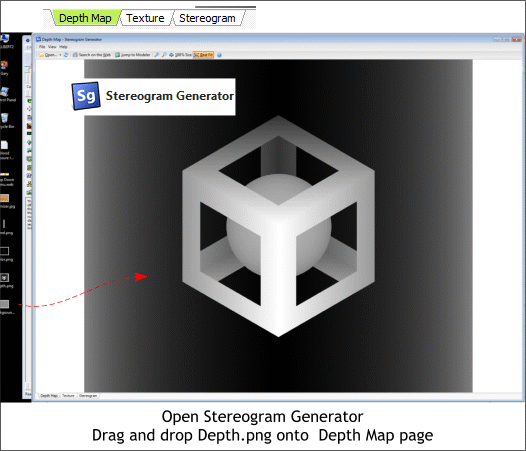
Open Stereogram Generator. Resize the window so you can see the files we created on the Desktop.
Stereogram Generator automatically opens to the Depth Map window. Drag the image Depth.png and drop it into the window.
Save your work and take a short break.
|