|

Group the gray Linear filled shapes (Ctrl g or Arrange > Group).
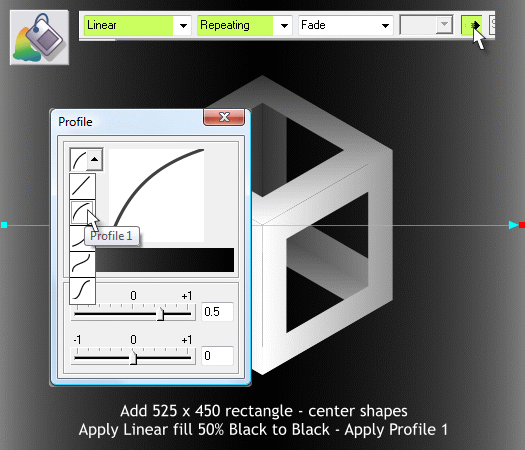
Create a rectangle 525 pixels wide by 450 pixels tall. Apply a horizontal Linear fill 50% Black to Black. Select Repeating from the Fill Effect drop
down list. Press the Profile arrow icon and select Profile 1 from the Profiles drop down list. This expands the center of the fill outwards.
NOTE: If your fill has black on the outsides and gray in the middle, reverse the color.
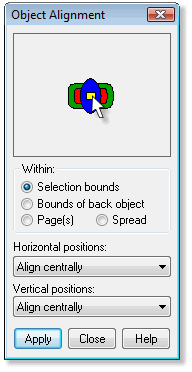
Select the new rectangle and the grouped shapes. Open the Alignment dialog (Arrange menu), and Align Centrally vertically and horizontally.

TIP: With the grouped shapes and the background rectangle selected, open the Object Alignment dialog and simply click in the center of the
preview window. This automatically center aligns the selected objects. You can also click on the corners or in between to achieve other alignments. But for this tutorial, use the center alignment.

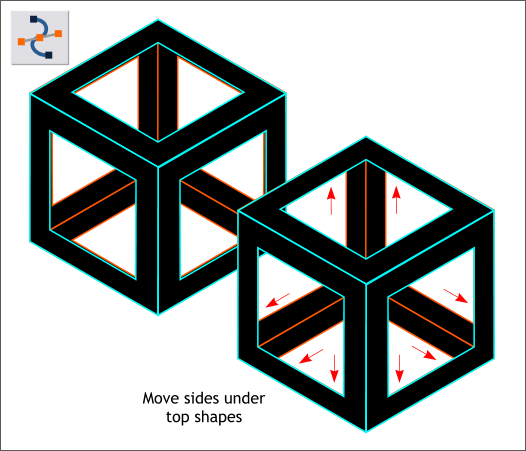
You should already have done this in the last page. But just in case. Extend those sides that are close to the outside shapes.

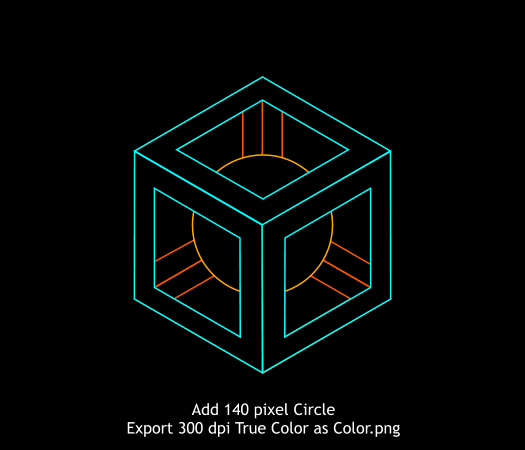
Add a 525 x 450 pixel black rectangle behind the cyan and red outlined shapes.
Add a black circle with an orange 1.5 pixel outline in the very center. Bring the 3 front shapes to the front (Ctrl f or Arrange > Bring to Front).
Group these objects, but not the rectangle, and center align them to the rectangle.
Select the rectangle and select File > Export. Select PNG from the drop down list of file types. Name the file Color.png and Export to the Desktop.
Select the True Color Color Depth option and set the Bitmap Resolution (Bitmap Size tabbed section) to 300dpi. Press Export.
|