|

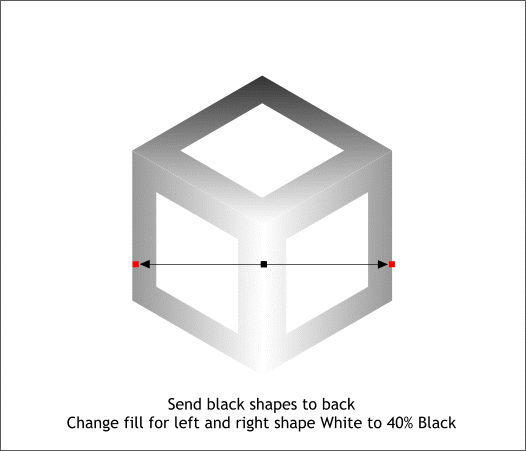
Select the three black shapes with the cyan outlines and send them to the back (Arrange > Send to Back or Ctrl b). Select either the bottom left or right shape and change the Linear
fill and the direction of the fill path arrow to horizontal. Change the end color to 40% Black. Repeat for the opposite side. Notice how the fill matches along the edges that border the top shape.
This is important for our stereogram because if these fills do not match the difference in the depth will be very evident in the actual stereogram.

This next step is not entirely necessary but it is a good technique to use when creating larger stereograms in which you want the depth image to be in the
exact same position on the page as with the outline version. So bear with me.
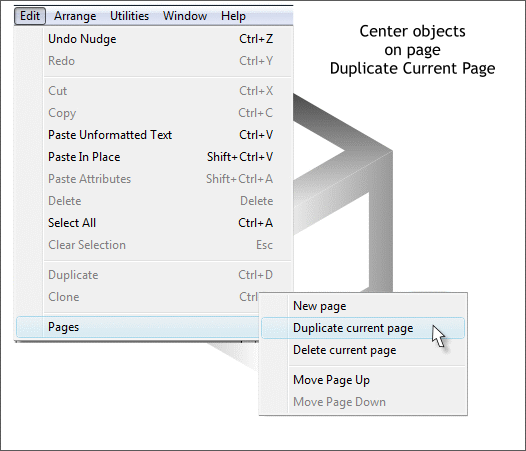
From the Edit menu, select Pages > Duplicate Current Page.
This copies everything you have created so far onto a new page in the same position. So it's a good idea to have everything on the current page where you want it before you duplicate the current page.

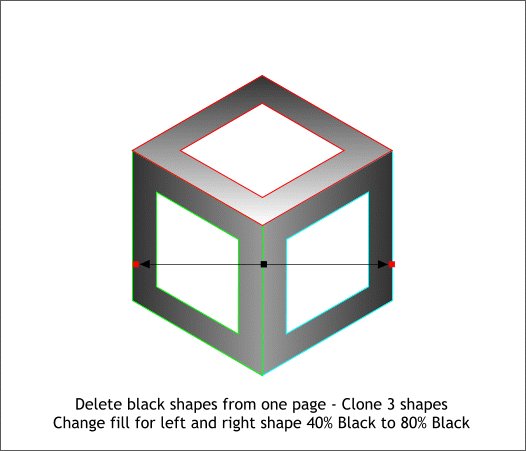
Navigate to the duplicate page. Hold down the Alt key and click twice on each shape to select the shape underneath (it will show on the status bar as black
with a cyan outline) and delete these shapes. You will be left with the three gray and white filled shapes.
Hold down the Shift key (to select multiple objects) and click on all three shapes. Press Ctrl k or Edit > Clone to create an in place duplicate (a clone)
of the three selected shapes.
Change the fill colors for the left and right shapes as shown above.
Save your work and take a short eye break.
|