 |
 |
|||||||
| H 1 2 3 4 5 6 7 8 9 10 11 Download Zipped Tutorial | ||||||||
|
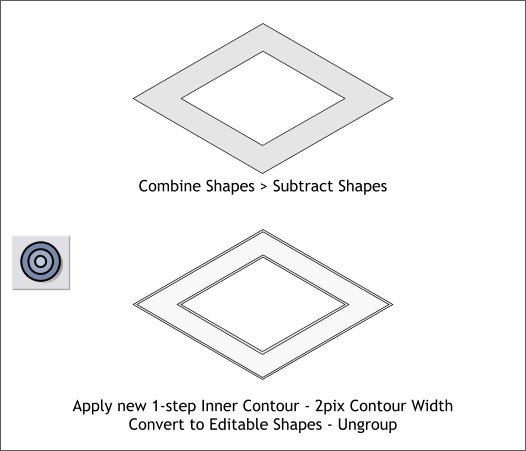
With the two shapes selected, from the Arrange menu, select Combine Shapes > Subtract Shapes or press Ctrl 2. Switch back to the Contour Tool (Ctrl F7). Drag a short distance towards the center. Change the number of Steps to 1 and press Enter. Change the Contour Width to 2pix and press Enter. Arrange > Convert to Editable Shapes and Arrange > Ungroup.
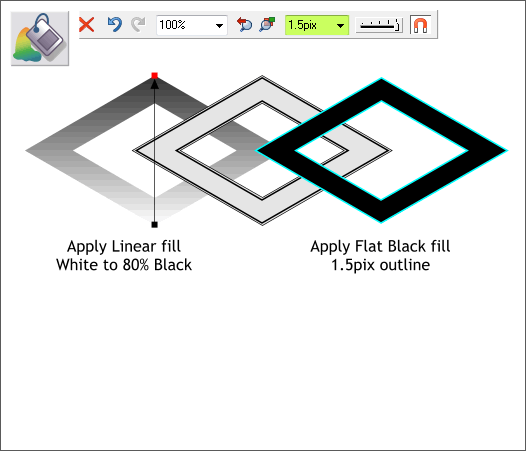
Select the larger of the two shapes (shown on the left). Select the Fill Tool (F5). Click on the bottom center point, hold down the Ctrl key to constrain the direction, and drag up to the top point. This is the intuitive way to create a Linear fill. Click on the small box at the end of the fill path arrow and click the 80% Black color on the screen palette. Select the smaller shape and left click on the Black color on the screen palette. Right click on the cyan color on the screen palette (if you get a pop up menu select Outline Color ). On the Infobar change the width to 1.5pix. (Highlight the number in the Width text entry box and key in 1.5 and press Enter). NOTE: In the illustration above, the center image represents both shapes one on top of the other before the fills have been applied, and which for the sake of clarity have been illustrated off to each side.
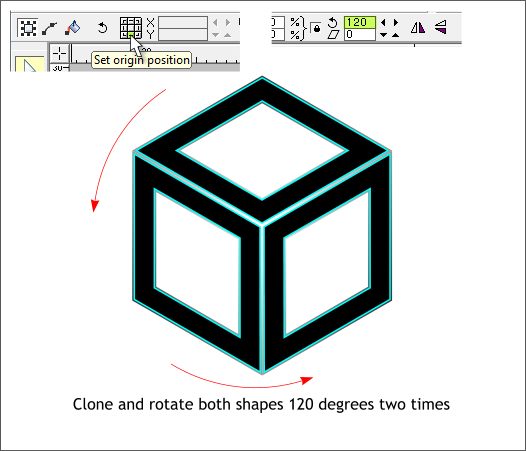
Select both shapes by dragging a selection rectangle (a marquee) around both shapes with the Selector Tool (the arrow pointer). Click the bottom center square button on the Set Origin Point icon on the Infobar. This repositions the rotation point down to the bottom center of the selection. Clone the two shapes (Ctrl k) and rotate them 120 degrees. Clone the two shapes again and rotate another 120 degrees. The easiest way to accomplish this is with the two cloned shapes selected and the origin point set bottom center, key in 120 in the Angle of Selection text entry box and press Enter . Clone the two shapes, key in 120 and press Enter again.
|
||||||||
|
|
||||||||


