 |
 |
||||||||
| 0 1 2 3 4 5 6 7 8 9 10 11 12 Download Zipped Tutorial | |||||||||
|
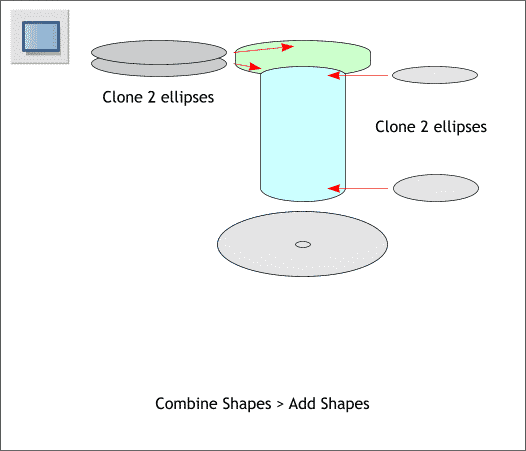
Clone the top two ellipses and the 3rd and 4th ellipses. Set them to one side. Select the top two ellipses and the rectangle and Arrange > Combine Shapes > Add Shapes (or Ctrl 1). This creates one shape with one outline. Repeat this last step for the 3rd and 4th ellipses and rectangle.
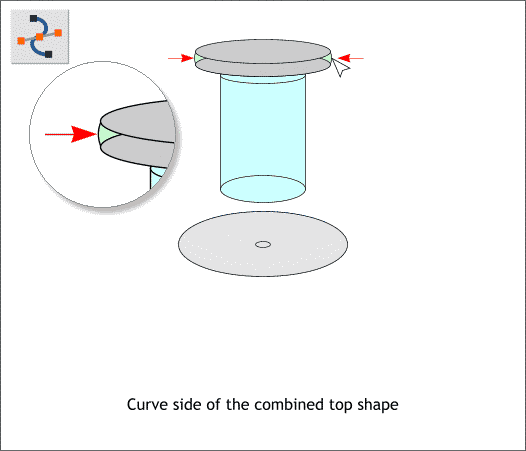
Place the cloned ellipses back in their original position. Select the combined top shape (the combined ellipses and rectangle) then switch to the Shape Editor Tool (F4). Drag the sides of the shape into a gentle curve. Zoom in close to make this easier by dragging a selection rectangle over the top shape with the Zoom Tool (the magnifying glass button).
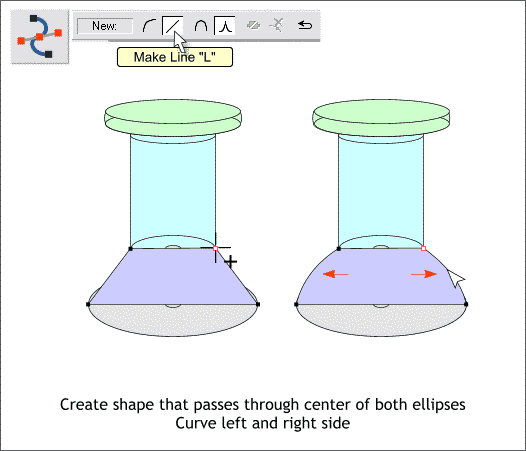
Select the Shape Editor Tool (F4). Click the orange magnet icon on the Infobar to enable Snap To Objects (or Window > Snap to Objects). Select the Make Line option (the diagonal line) on the Infobar. Click 4 line segments with the Shape Editor Tool that snap to the centers of both ellipses as shown above left. Click the last control point on top of the first control point, the cursor will change to display a + , to indicate a closed shape (the shape will fill solid when the shape is closed). Still using the Shape Editor Tool, drag the left and right sides of the shape outward to create curved sides as shown above right. Save your drawing and take a short break.
|
|||||||||
|
|
|||||||||


