 |
 |
||||||||
| 0 1 2 3 4 5 6 7 8 9 10 11 12 Download Zipped Tutorial | |||||||||
|
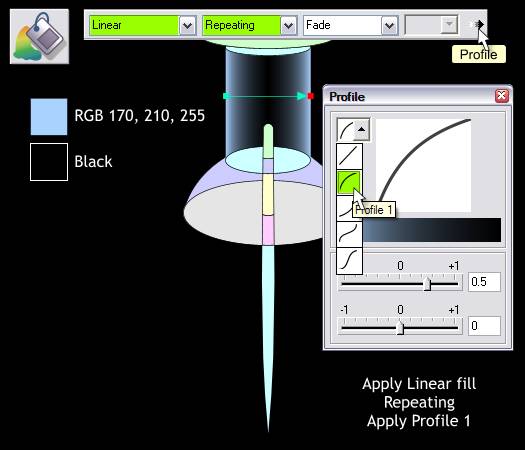
Add a black rectangle behind the shapes. Select the long shape and then select the Fill Tool (F5). Click to the left of the shape. Hold down the Ctrl key and drag to the right edge to apply a Linear fill. From the Fill Tiling drop down list on the Infobar, select Repeating. NOTE: The order of the colors is important. The pale blue color is on the left and the black is on the right. Change the start and ending colors to the two colors shown above left. If you need help with how to apply fills and edit colors see Workbook 31. With the Fill Tool and the filled shape selected, click the Profile arrow icon (shown above top right). From the drop down list, select Profile 1. Close the Profile dialog. A Profile 1 profile expands the black in the center and condenses the pale blue on the outsides. If you are not familiar with Profiles, try all the settings to see how they affect the fill. Then apply the Profile 1.
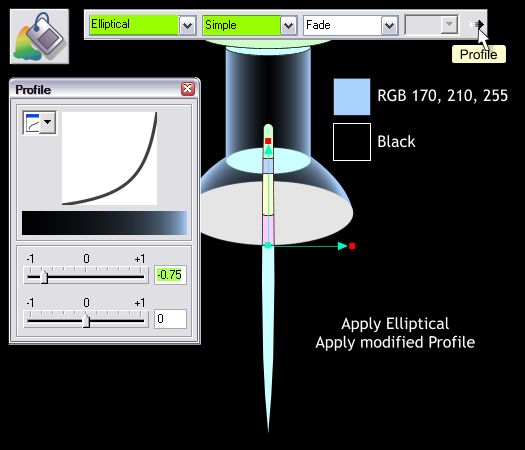
Select the Fill Tool (F5) then select the rounded combined shape that makes up the wide skirt like portion of the pushpin. From the Fill Type drop down list on the Infobar, select Elliptical . Drag the center of the fill down to the bottom of the shape and extend the fill path arrows as shown above. The Fill Tiling should be set to Simple. Apply a Profile 1 preset and then change the setting to -0.75.
|
|||||||||
|
|
|||||||||

