 |
 |
||||||||
| 0 1 2 3 4 5 6 7 8 9 10 11 12 Download Zipped Tutorial | |||||||||
|
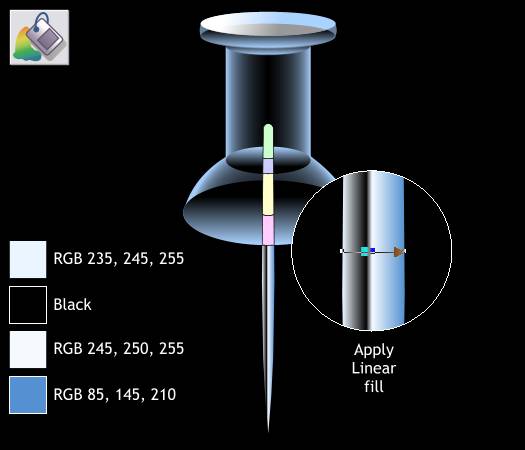
Zoom in close to the center of the pin shape. Apply a Linear fill. Double click on the fill path arrow to add a new color. Double click again to add a second color. Use the four colors shown above left and move the 2nd and 3rd colors close together to produce a harder edge. TIP: You can select one of the colors on the fill path arrow then use the the arrow keys on your keyboard to move the colors on the fill path. Hold down the Alt key to move the colors a just small amount.
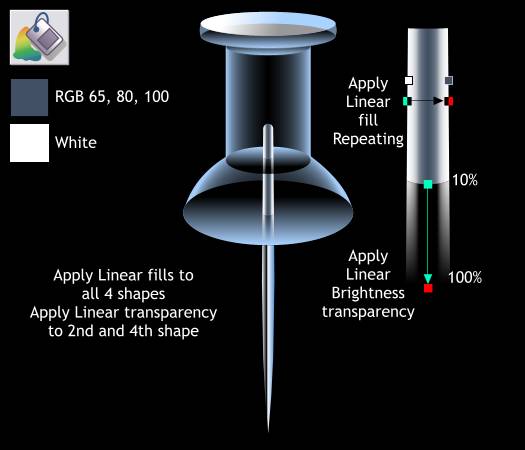
Select the top four pin shapes and apply a Repeating, Linear fill starting on the left with White and ending on the right with the gray blue color. Select the second shape down and apply a Linear transparency. End the transparency short of the end of the shape to make the shape fade away. Click on the start control handle and change the Transparency slider setting on the Infobar to 10%. Press Enter to apply the change. Copy this shape and Paste Attributes (Edit menu) to the 4th pin shape.
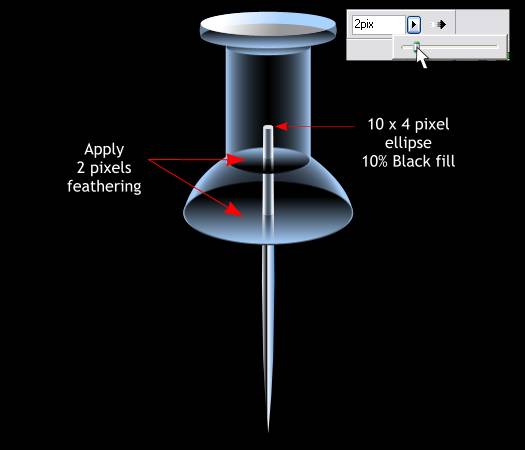
Select the two ellipses indicated above and apply 2 pixels of feathering using the Change Size of Feather Region slider which is located in the upper right area of the Infobar. Feathering softens the edges of a shape without effecting the inside of the shape. Save your drawing and take a short break.
|
|||||||||
|
|
|||||||||


