 |
 |
||||||||
| 0 1 2 3 4 5 6 7 8 9 10 11 12 Download Zipped Tutorial | |||||||||
|
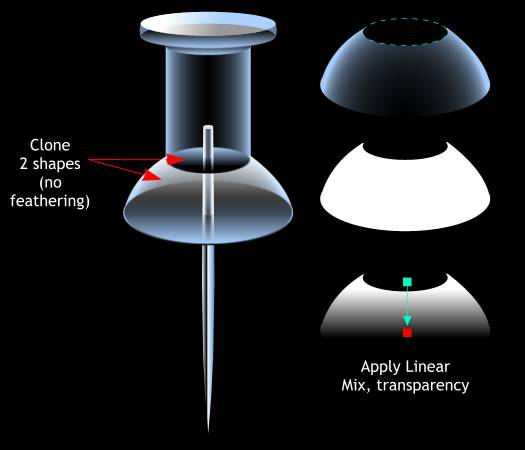
Clone the two shapes indicated above (Ctrl k). Select the two cloned shapes and press Ctrl 2 or Arrange > Combine Shapes > Subtract Shapes. This removes the top shape from the bottom shape. Change the fill color to White. Select the Transparency Tool (F6). Click and drag from the top of the shape to about the middle of the shape. This creates a nice highlight on the flared portion of the pushpin.
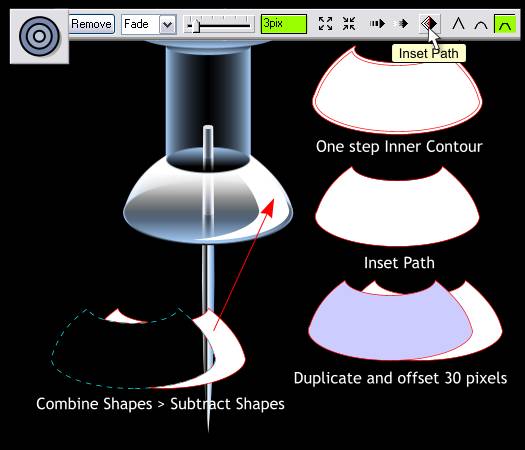
Make a clone of the new shape and set the transparency to none. Select the Contour Tool (Ctrl F7). Click on the clone to select it then drag any of the red arrows towards the center just a small distance. Change the Contour Width setting to 3pix and press Enter. (If you use the slider you do not need to press Enter). Press the Inset Path diamonds icon. This eliminates all but the inner most contour shape. Clone the new shape and move it to the left about 30 pixels. Select both shapes (hold down the Shift key to multiple select). Arrange > Combine Shapes > Subtract Shapes (Ctrl 2). The resulting shape is shown over the flared section of the pushpin.
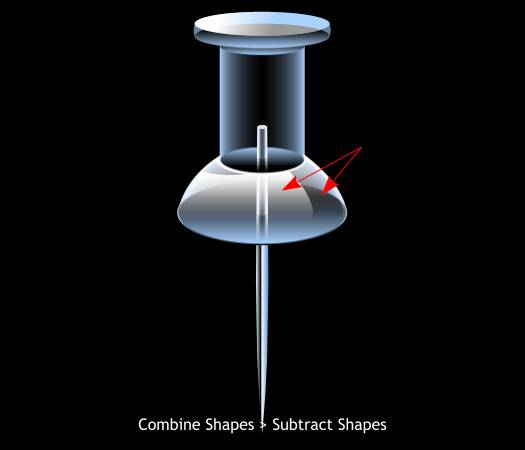
Select the new shape and the highlight shape underneath it and Subtract Shapes (Ctrl 2). This creates a kind of reverse highlight.
|
|||||||||
|
|
|||||||||


