 |
 |
||||||||
| 0 1 2 3 4 5 6 7 8 9 10 11 12 Download Zipped Tutorial | |||||||||
|
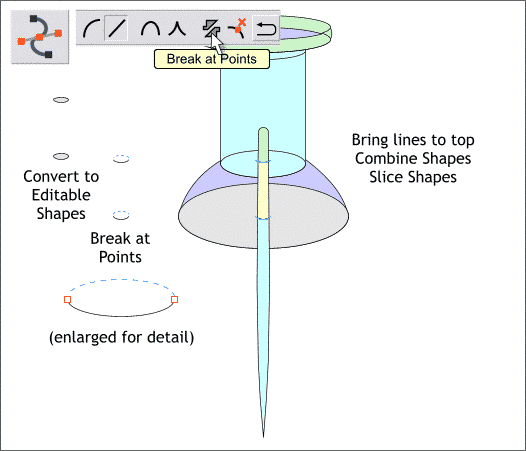
NOTE: I have moved the small ellipses to the left to make it easier to see what we are doing. Keep your small ellipses in their current position and do not move them. Select the two small ellipses. From the Arrange menu, select Convert to Editable Shapes. Zoom in close to the ellipses. With the ellipses selected, switch to the Shape Editor Tool (F4). Select the left and right control points shown in the enlarged image above, and press the Break at Points icon on the Infobar. Delete the top half of each ellipse. Select the top half ellipse and the pin shape and Arrange > Combine Shapes > Slice Shapes (Ctrl 4). Repeat this last step for the second half ellipse.
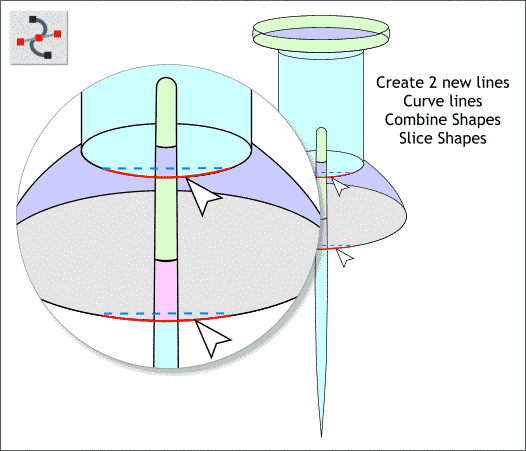
Zoom in close to the area shown above in the enlargement. Using the Shape Editor Tool, draw 2 lines and then curve them to match the two areas shown above in the insert. Combine Shapes > Slice Shapes (Ctrl 4). You should now have 5 separate sections for the pin shape. This completes the drawing and is a good place to stop, save your work and take a short break. Next we'll apply the colors.
|
|||||||||
|
|
|||||||||

