 |
 |
||||||||
| 0 1 2 3 4 5 6 7 8 9 10 11 12 Download Zipped Tutorial | |||||||||
|
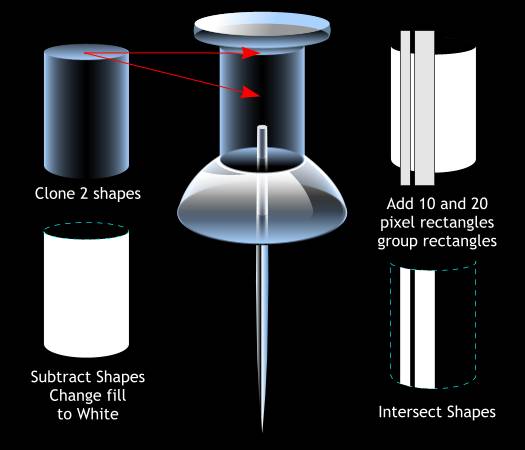
Clone the two shapes indicated above. Change the fills to White. Arrange > Combine Shapes > Subtract Shapes (Ctrl 2). Using the Rectangle Tool (Shift F3) create two rectangles to the sizes shown above top right. Group (Ctrl g) the two rectangles and position them as shown above over the curved white shape. Select the rectangles and the white shape and Arrange > Combine Shapes > Intersect Shapes (Ctrl 3). The crops the rectangles to the curved shape.
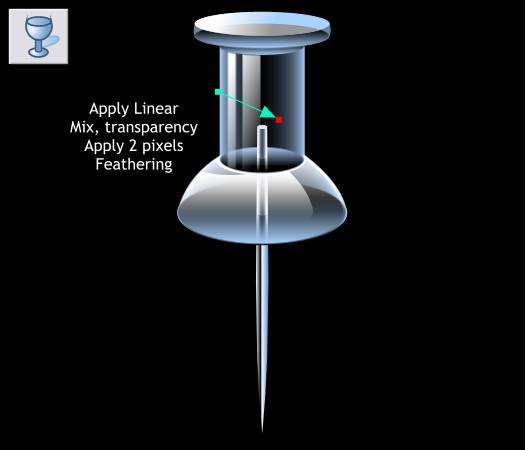
Apply a diagonal Linear, Mix transparency as shown.
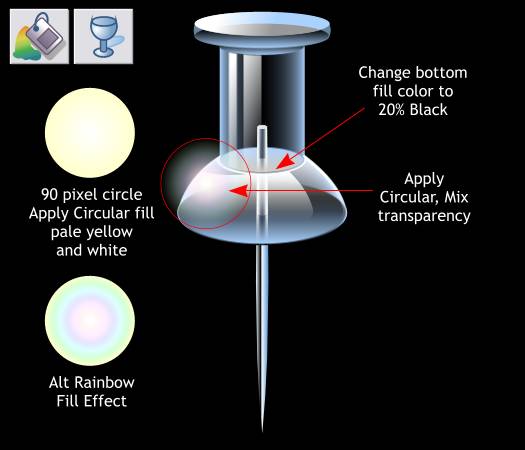
Finally, create a 90 pixel circle. Select the circle with the Fill Tool (F5). From the drop down list of Fill Types on the Infobar, select Circular. (The interactive way to apply a Circular fill is to click in the center of the object, hold down the Shift key, and drag). From the Fill Effect drop down list, select Alt Rainbow. Select the circle with the Transparency Tool (F6) and from the drop down list of Transparency Shapes, select Circular. This creates a flared highlight. Position the highlight as shown.
|
|||||||||
|
|
|||||||||


