 |
 |
||||||||
| 0 1 2 3 4 5 6 7 8 9 10 11 12 Download Zipped Tutorial | |||||||||
|
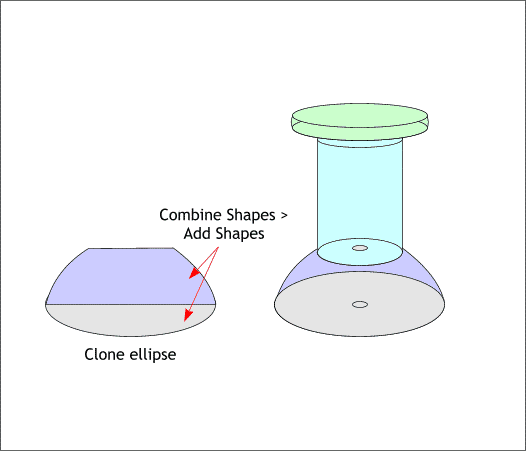
Clone the bottom ellipse. Select the clone and the new shape (shown in pale purple) and Arrange > Combine Shapes > Add Shapes (Ctrl 1). Send this new shape to the back (Ctrl b). Your shapes should look like the illustration top right. The colors are arbitrary and just to help you distinguish the various objects.
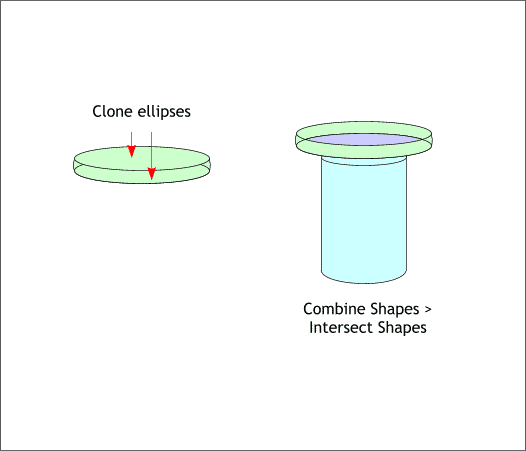
Clone (Ctrl k) the top two ellipses. With the two cloned ellipses selected, Arrange > Combine Shapes > Intersect Shapes (Ctrl 3). (This creates a shape where the two ellipses overlap and deletes all the rest). The result is shown above in pale purple.
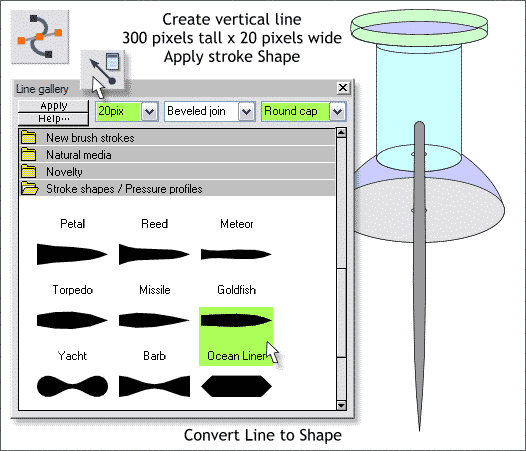
Select the Shape Editor Tool (F4). Click on the page. Hold down the Ctrl key and drag up or down to create a vertical line that is 300 pixels tall. Open the Line Gallery (F12). In the Width text entry box, key in 20pix and press Apply. From the Set Line Cap drop down list, select Round Cap. With the line selected, open the Stroke Shapes section. Scroll down and select the Ocean Liner shape (shown above) and press Apply. This create the pin shape. From the Arrange menu, select Convert Line to Shape. The line is now converted to a filled shape.
|
|||||||||
|
|
|||||||||


