 |
 |
||||||||
| 0 1 2 3 4 5 6 7 8 9 10 11 12 Download Zipped Tutorial | |||||||||
|
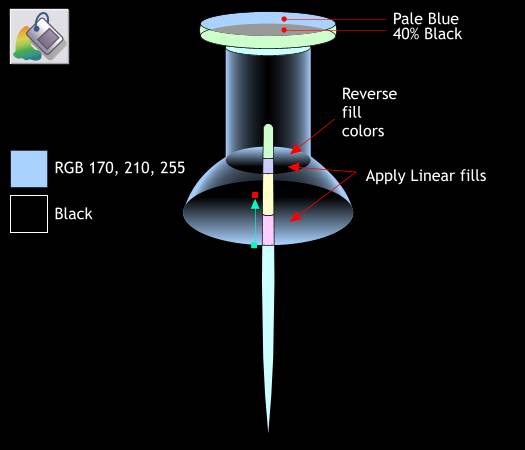
Select the top ellipse (shown above in pale blue) and change the color to pale blue color shown. Select the intersected shape and change its color to 40% Black. Select the largest ellipse at the bottom of the objects and apply a Linear fill. Start the fill at the bottom of the large ellipse and and the fill at about 4/5 of the way up. Copy this fill to the clipboard (Ctrl c). Select the smaller ellipse at the top of the two shapes and Edit > Paste Attributes or Shift Ctrl a. Reverse the fill colors. The easiest way to do this is select the ellipse and then press the Flip Vertically icon (the two triangles) on the Infobar.
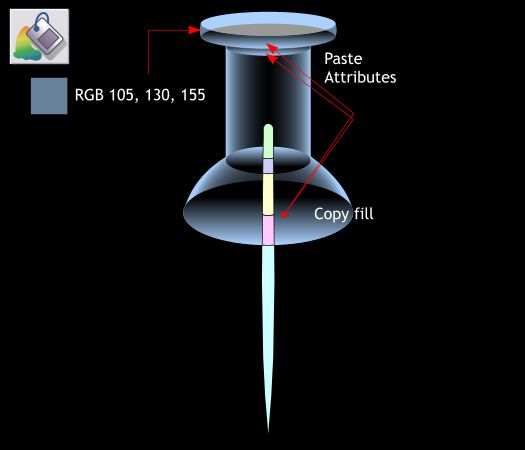
Select the shape that extends to the sides on the top shape and apply the color shown above. Copy the bottom fill and Past Attributes to the second of the top two ellipses and to the ellipse just showing underneath the second ellipse.
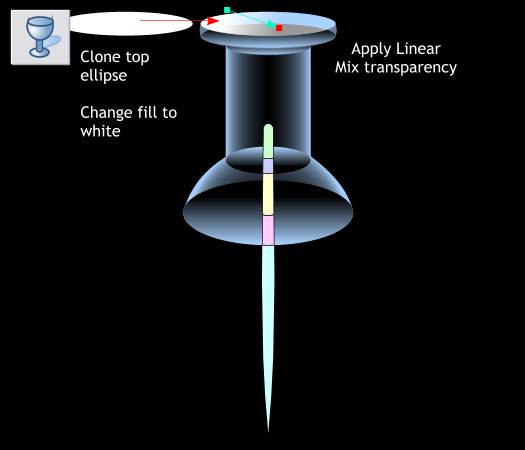
Clone the top ellipse. Change the fill to White. Select the Transparency Tool (F6). Click and drag from the top left area and drag down and to the right ending short of the edge of the ellipse as shown to apply a Linear, Mix transparency. NOTE: Xara offers several ways to apply gradient fills and gradient transparencies. The method I have shown here is interactive. You may also select from the drop down list of Fill Types and Transparency Shapes and then adjust the fill path arrows as needed.
|
|||||||||
|
|
|||||||||


