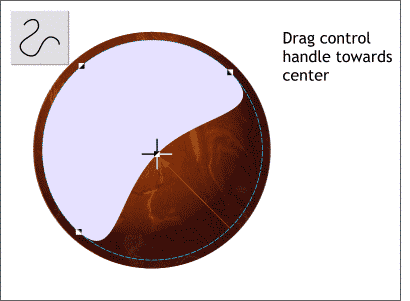
 Select the pale purple circle with the Selector Tool, then select the Shape Editor Tool to enable
editing. Select the control handle in the lower right corner and drag it towards the center of the circle as shown.
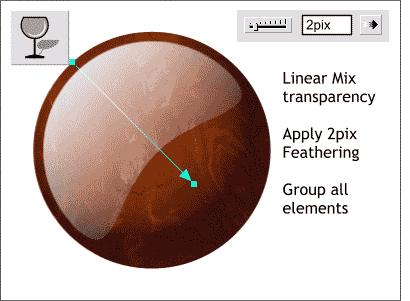
 Select the Transparency Tool. Click on the pale purple shape and drag from the top left to the bottom
right as shown. Drag the end of the fill path a little beyond the end of the shape.
Apply a feather amount of 2pix. The Change Size of Feather Region slider is at the top right of the Infobar.
Group all the elements (Ctrl g).
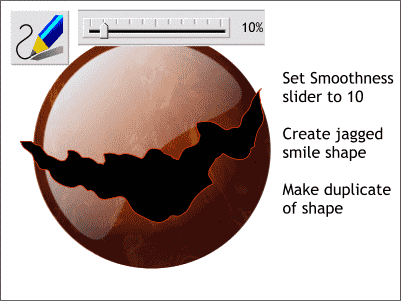
 Select the Freehand and Brush Tool. Move the Smoothness slider to the left to about 10 to increase
the accuracy of the line.
Draw a shape that resembles the shape shown here. It is somewhat like a crooked smile. Draw the end of the line over the starting point to create a filled shape.
Duplicate this shape and set the duplicate aside.
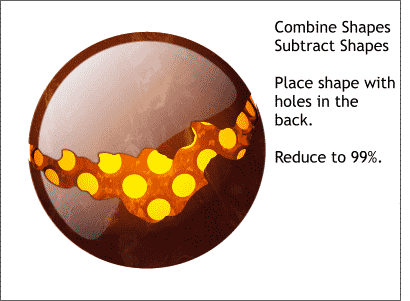
 Select the shape and the grouped elements.
From the Arrange pull down menu, select Combine Shapes... Subtract Shapes.
Center this over the glowing sphere. Reduce the size of the glowing sphere to 99%.
Save your work and take an eye break.
|
|
|
|
|
|
|
|