
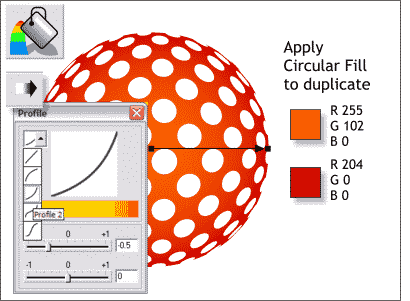
 Make a clone of the sphere (Ctrl k). Select the clone with the Bevel Tool and from the drop down list of Bevel Types, select
None.
Select the Fill Tool, select the sphere, and from the drop down list of Fill Types, select Circular.
Change the fill colors to the two shown here.
Click the Profile arrow on the Infobar to open the Profile dialog. From the drop down list of preset profiles, select Profile 2. Make a duplicate of this sphere. We will need it towards the end of the tutorial.
CHANGING FILL COLORS: To change the fill colors to those shown, open the Color Editor (press the small color wheel icon to the left of the screen palette or Ctrl e ). Click the center control handle (the small square at the end of the fill path arrow). Select RGB Color Model in the Color Editor drop down list of Color Models and enter the three values for the lighter orange. Click the outside control point and change the values to those of the darker red.
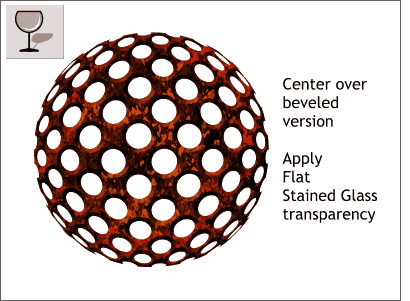 Select the cloned sphere with the Transparency Tool. Select Stained Glass from the drop down list of Transparency Types.
This adds a rusty appearance to the sphere.
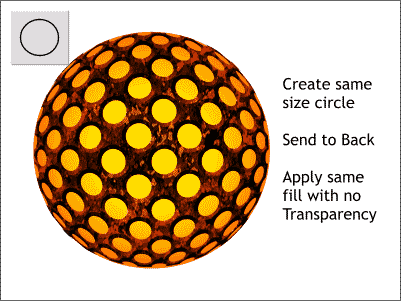 Using the Ellipse Tool, and holding down the Ctrl key to constrain the ellipse to a circle, create a circle the
same size as the sphere.
Apply a Circular fill using the same 2-color fill as we applied at the top of the page.
Send the circle to the back (Ctrl b or Arrange > Put to Back).
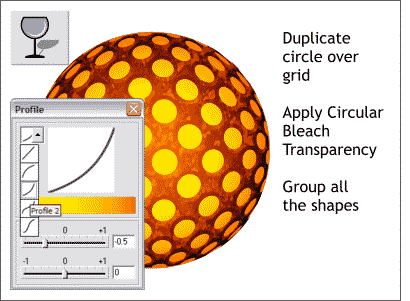 Select the circle we just sent to the back and press Ctrl k to create a Clone duplicate.
Apply a Circular, Bleach transparency. Open the Profile dialog and select Profile 2.
This adds a diffused hot glowing effect.
Save your work and take a short eye break.
|
|
|
|
|
|
|
|