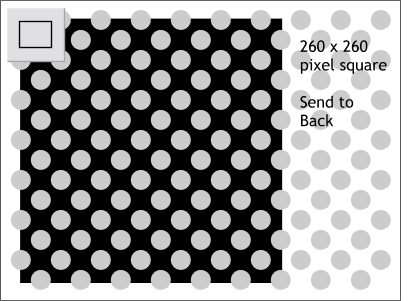
 We will need a square portion of the circles for this next step.
Using the Rectangle Tool, and holding down the Ctrl key to constrain the rectangle to a square, drag a 260 x 260 pixel square. (Enabling Snap to Grid will help).
Center the square over the circles as shown and send it to the back (Ctrl B).
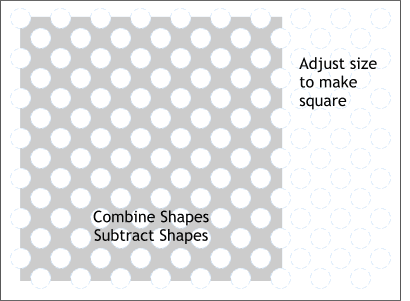
 Select the square and the circles and from the Arrange menu, select Combine Shapes... and from the fly out menu,
select Subtract Shapes.
As you can see, this process physically removes the circles from the square.
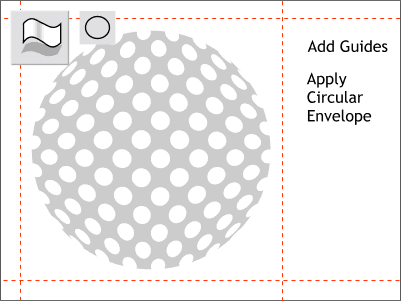
 We want the square to appear to be a sphere with the circles wrapped around the sphere in perspective. To do this we will use a
double Circular Envelope.
Drag four guidelines from the screen rulers onto the page and align them to the four sides of the square.
RULERS: If you do not see rulers on the top and left side of the screen, open the Window pull down menu and select Bars... Rulers or press Ctrl L.
Click the square with the Mould Tool. Click the Circular Envelope icon on the Infobar at the top of the screen to apply the envelope. As you can see, while this distorts the square into a circle, the circular holes in the shape are not very accurate in terms of wrapping around the sphere.
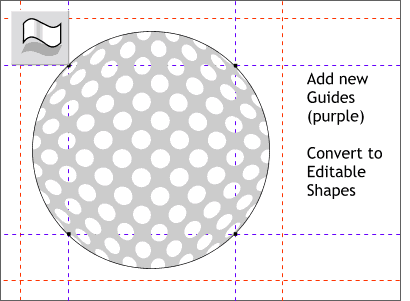
 With the Mould Tool and the circle still selected, drag four more guidelines that pass though the four
control handles (the small black squares) as shown here. I colored the new guidelines purple to differentiate them from the other guides.
Convert the circle to Editable Shapes (Arrange > Convert to Editable Shapes). This step is important as you will see in a moment.
Name and save your drawing (always do this frequently, even if I don't remind you to) and take a short eye break.
|
|
|
|
|
|
|
|