|
 NOTE: This next step seems tedious. But when I combined the lines with the circles and removed the combined shape from the square the circles became wobbly and not a
pretty site to behold. After much experimentation, I came upon the following, labor intensive, workaround. NOTE: This next step seems tedious. But when I combined the lines with the circles and removed the combined shape from the square the circles became wobbly and not a
pretty site to behold. After much experimentation, I came upon the following, labor intensive, workaround.FURTHER NOTE: I just this very minute received word from Xara that "this problem has been fixed in Xara X v1.0c
, which should be available soon [on the Xara.com web site]."
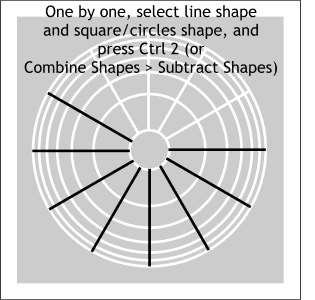
Meanwhile, back at the tutorial. Select one line at a time, then the gray mask and press Ctrl 2
(the shortcut for Combine Shapes > Subtract Shapes) until all 12 line shapes have been removed. |

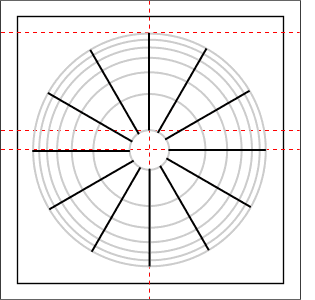 Continue until you have a total of
12 lines as shown here.
Continue until you have a total of
12 lines as shown here.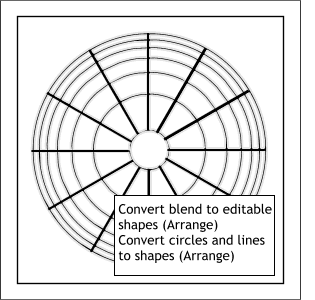 Select all the circles and from the Arrange
pull down menu, select Convert Line to Shape. Select all seven circles and once again from the Arrange menu, select Combine Shapes > Add Shapes.
Select all the circles and from the Arrange
pull down menu, select Convert Line to Shape. Select all seven circles and once again from the Arrange menu, select Combine Shapes > Add Shapes. 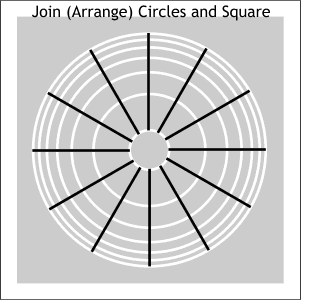 Select the blended circles shape and
then the square, and from the Arrange menu, select Join. Apply a light color fill (temporary) to the new shape.
Select the blended circles shape and
then the square, and from the Arrange menu, select Join. Apply a light color fill (temporary) to the new shape. After all that work, name and save
your file and take an eye break.
After all that work, name and save
your file and take an eye break.