|
 Select the two circles and the square by
dragging a rectangle around them with the Selector Tool (the pointer tool). This is known as marquee selecting. Select the two circles and the square by
dragging a rectangle around them with the Selector Tool (the pointer tool). This is known as marquee selecting.
NOTE: If there are any Adobe Illustrator users out therescoping out this hot product Xara X, unlike Illustrator, you have to marquee select the entire object, not just a
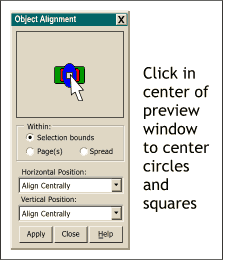
portion of the object, to select it.Open the Object Alignment menu (Arrange > Alignment). The easiest way to center align any selected
objects is to simply click the Selector Tool in the center of the preview window. The four shapes will automatically center indicating center horizontally and vertically. Press Apply then Close
to exit the menu. You can also click in any of the four corners to select align top left, etc. |

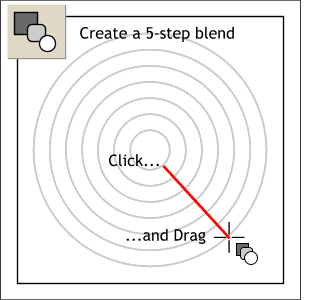 Select the Blend Tool. Click on the
smaller circle's outline, then drag a line to the larger circle's outline. This creates a 5-step blend (seven circles in all). You can increase the steps by changing the Number of Steps in Blend setting on the
Infobar. But for this tutorial the requisite 5 steps will be fine.
Select the Blend Tool. Click on the
smaller circle's outline, then drag a line to the larger circle's outline. This creates a 5-step blend (seven circles in all). You can increase the steps by changing the Number of Steps in Blend setting on the
Infobar. But for this tutorial the requisite 5 steps will be fine.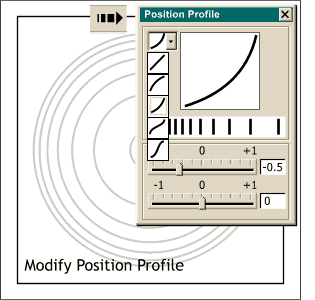 Profile settings are new to Xara X and represent a powerful and easy way to alter many of Xara's effects.
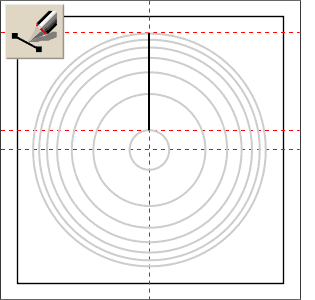 Drag a guideline (from the screen
rulers) through the vertical center of the circles. Add a guideline through the horizontal center, and add a guideline on top of the smallest and largest circles.
Drag a guideline (from the screen
rulers) through the vertical center of the circles. Add a guideline through the horizontal center, and add a guideline on top of the smallest and largest circles.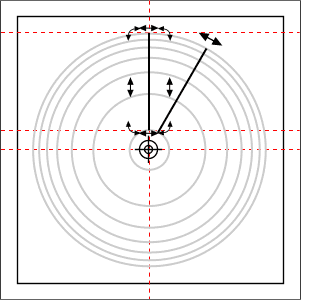 Open the Page Options dialog again and in the
General tabbed section, change the Angle Contraint: amount to 30 (degrees). Press OK to apply the change.
Open the Page Options dialog again and in the
General tabbed section, change the Angle Contraint: amount to 30 (degrees). Press OK to apply the change.