|
 Press OK to close the Text
Options window. Press OK to close the Text
Options window.The logo now should look like this. OK, you're thinking to yourself, I could have saved myself a peck of trouble by saving both the text and the O-shape in the same file and the results would
be the same. And for the moment, you'd be correct. However, one of the really cool things about Xara 3D 4 is you can apply different fills, bevels, extrusions, and such to individual characters or images
in this case. And to do what we want to do, we need to have the two items as separate characters as you shall see in just a moment.
|
|


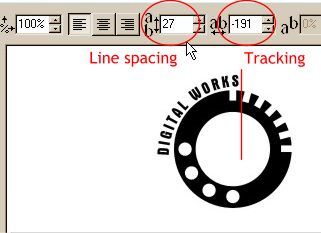 Position the insertion cursor
between the text and the O-shape. Adjust the Line Spacing and Tracking percentages until the text is aligned as shown. You can start with the numbers shown here and adjust as necessary.
Position the insertion cursor
between the text and the O-shape. Adjust the Line Spacing and Tracking percentages until the text is aligned as shown. You can start with the numbers shown here and adjust as necessary.