|
||
|
|
Highlight the O-shape. (See below for instructions). When the shape is selected it turns to black. The cursor becomes a large gray rectangle that changes size
depending upon the size of the text or object. On the bottom of the screen, change the Font Size to 150%. Highlight the text image and make sure the Font Size is 100% |
||||||||
EDITING TEXT WITH THE SHOW/HIDE CURSOR: In a few moments things are going to get a bit weird and so here are some basic text editing tips to help you get the cursor where you want it. To go to the beginning of the text (the DIGITAL WORKS text) press Ctrl and the Home key. To go to the last character (the O-shape) press Ctrl and then End key. To highlight text (or characters or symbols) hold down the Shift key and press the arrow key in the direction you want the cursor to move. For example, to highlight the O-shape, press Ctrl - End to go to the end of the text, then hold down the Shift key and press the left arrow key. You can use this technique in Xara 2 as well. |
||||||||
 |
 |
 |
||||||
|
||||||||
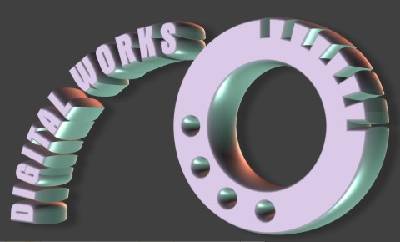 Open Xara 3D 4. We'll use the settings
for the default image for the logo we are going to create.
Open Xara 3D 4. We'll use the settings
for the default image for the logo we are going to create.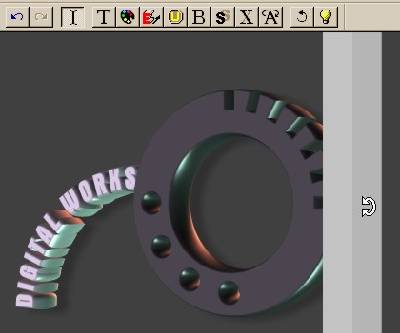 Select the Show/Hide Cursor
button (next to the T Text Options icon).
Select the Show/Hide Cursor
button (next to the T Text Options icon).