As always, we will be using Pixels as our units of measure. Right click on the screen and select Page Options... from the pop up menu. In the Units
tabbed section, select Pixels for the Units and 0-255 for the Color Units. In the Grid and Ruler tabbed section set the Major Spacing to 100pix
(key it in exactly like this) and the Number of Subdivisions to 10. Press OK to close the dialog and apply the changes.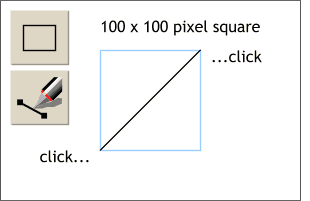 Select the Rectangle Tool and while holding down the Ctrl key, which constrains the rectangle to a square, drag a 100 pixel square. Look at the
Infobar at the top of the screen while you are dragging to see the size displayed. Set the fill to none by clicking the left mouse button in the cross hatched square to the left of the screen palette (clicking the
right mouse button in this square sets the outline to none). Select the Rectangle Tool and while holding down the Ctrl key, which constrains the rectangle to a square, drag a 100 pixel square. Look at the
Infobar at the top of the screen while you are dragging to see the size displayed. Set the fill to none by clicking the left mouse button in the cross hatched square to the left of the screen palette (clicking the
right mouse button in this square sets the outline to none).
NOTE:
Your square will have a black outline and a black fill. There is nothing wrong with your copy of Xara. I changed the outline of the square to help you see the diagonal line better. Click the red magnet icon on the Infobar to enable Snap to Objects. Select the Pen Tool and click in the lower left corner
of the square to place the starting anchor point. Click in the top right corner to place the end anchor point. |

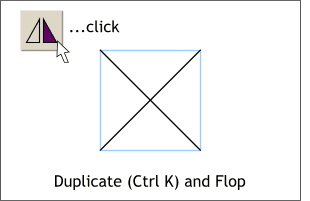 Select the diagonal line you just created and press Ctrl K
(or Edit > Clone) to duplicate the line in the exact same place.
Select the diagonal line you just created and press Ctrl K
(or Edit > Clone) to duplicate the line in the exact same place.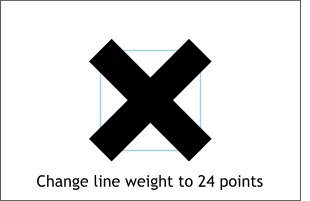 Select the two diagonal lines (hold down the Shift
key, and click on each line to multiple select).
Select the two diagonal lines (hold down the Shift
key, and click on each line to multiple select).