
 Select the large rectangle and all the smaller rectangles then select the Mould Tool.
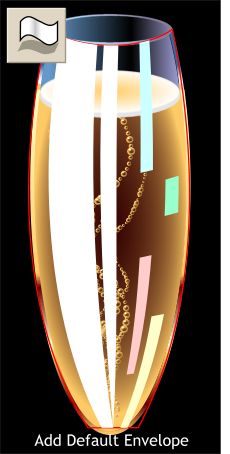
Click the Default Envelope icon on the Infobar (it's the first rectangle icon on the left of the Infobar that looks like the Rectangle Tool).
Drag the corner control points (the small squares) inward to the top of the rim, and the bottom of the glass.
Click the control points to enable the Bezier control handles (the red lines with the red boxes on the ends) then drag the Bezier control handles to shape the envelope to the shape of the glass. The larger rectangle (red outline) should repeat the shape of the glass.
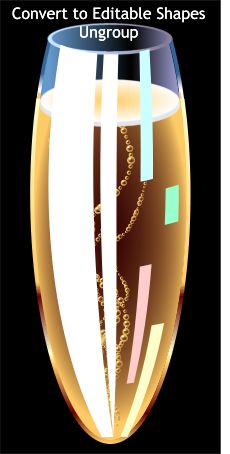 Convert the envelope to editable shapes (Arrange > Convert to Editable Shapes). This
disables the envelope and prevents any further editing.
Convert the envelope to editable shapes (Arrange > Convert to Editable Shapes). This
disables the envelope and prevents any further editing.
Ungroup the shapes and delete the largest rectangle.
 Select all the enveloped shapes and apply an Elliptical, Bleach Transparency. Drag the center
of the fill to the upper left portion of the glass as shown.
Select all the enveloped shapes and apply an Elliptical, Bleach Transparency. Drag the center
of the fill to the upper left portion of the glass as shown.
Click the center control point and change the Transparency slider setting on the Infobar to 20%. Select either of the outside control points and change the slider setting to 100%.
Click the Profile arrow icon on the Infobar and select Profile 3 to exaggerate the transparency.
These reflections add the appearance of roundness as well as a front side to the glass and impart a shiny appearance.
Save your work and take a short break.
|
|
|
|
|
|
|
|
|
|
|
|