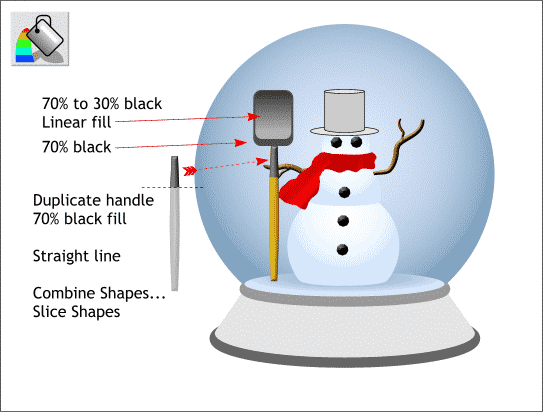

Apply a Flat, 70% black fill the larger of the two rounded rectangle that make up the shovel. Apply a Linear fill to the smaller rounded rectangle starting on top at 70% and ending with 30%. (Drag the fill path arrow ends so that the fill path arrow is vertical).
Make a duplicate of the shovel handle (Ctrl d). Marquee select the duplicate and change the fill color to 70% black by clicking the 70% black square on the on-screen color palette. Draw a horizontal line about 1/5 of the way down. Select the line and the gray duplicate and Arrange Shapes... Slice Shapes. Delete the bottom portion and center the remaining top portion under the shovel as shown above.

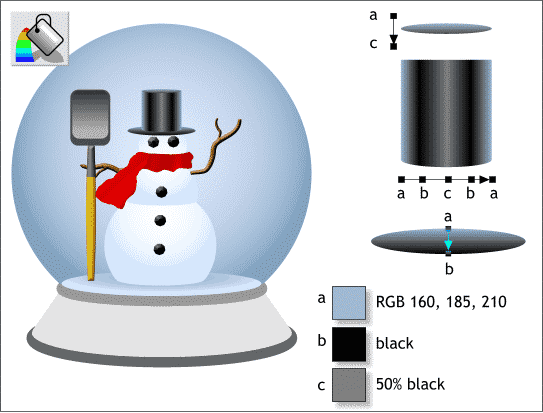
Apply the Linear fills shown above right to the portions of the hat. To add color to the Linear fill for the barrel portion of the hat, double click on the fill path arrow with the Fill Tool to add the additional color stations.

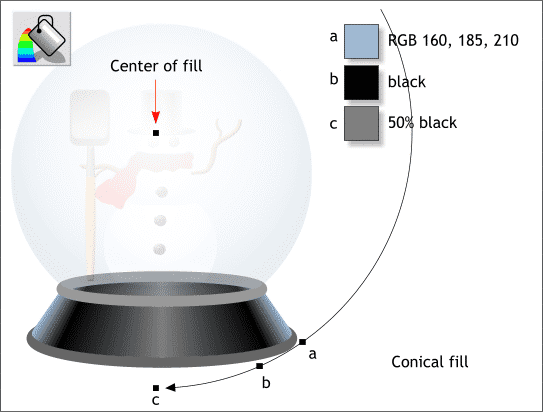
I have made the glass sphere and its contents lighter so you can see what we are doing to the base. Select the center portion of the base and apply a Conical fill (select Conical from the drop down list of Fill Types). Drag the center of the fill just under the snowperson's hat and expand the fill path half circle as shown. Double click on the fill path arrow to add two additional color stations (b and c) and apply the three colors shown.

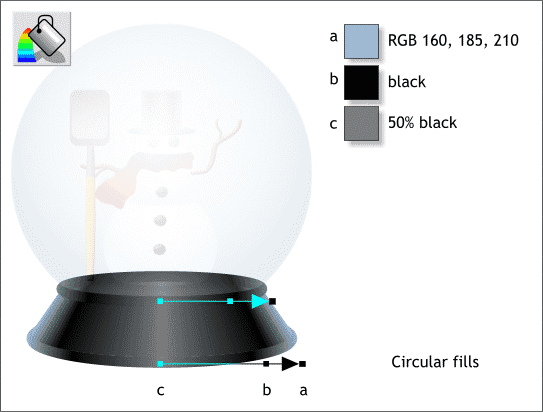
Apply Circular fills to the two elliptical shapes using the same three colors. Double click on the fill path arrow to add the third color station.
|
|
|
|
|
|
|
|