 |
 |
||||||||
| 0 1 2 3 4 5 6 7 8 9 10 11 Download Zipped Tutorial | |||||||||
|
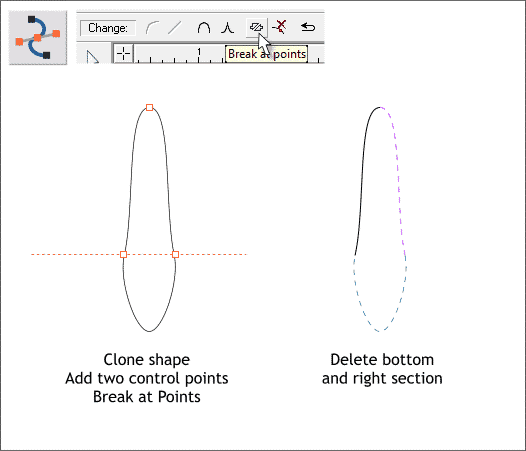
Clone the oblong shape. Select the clone and switch to the Shape Editor Tool (F4). Select the three control points shown above left in red outline. Press the Break at Points icon on the Infobar. Delete all but the top left section as shown. The blue dashed line indicates the deleted sections as well as the original teardrop shape.
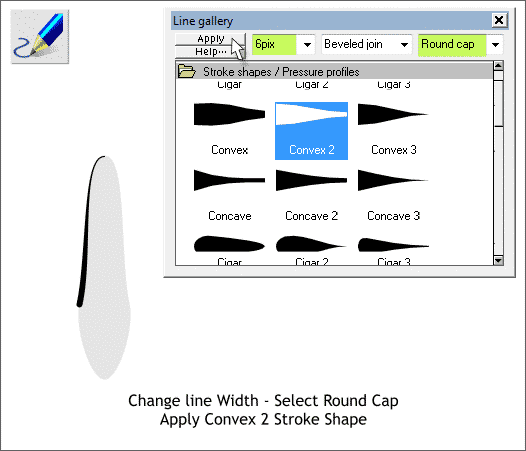
Select the remaining line. Open the Line Gallery (F12). Change the Width to 8pix. Change the Line End to Round Cap. From the Stroke Shapes folder, select Convex 2 (shown above) and press Apply. If the heavy part of the line is on top and not on the bottom as shown, switch to the Shape Editor Tool and press the Reverse Paths icon (covered on the previous page).
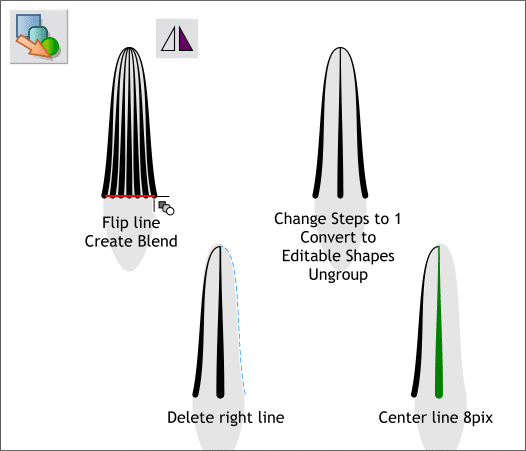
Clone the line (Ctrl k). Press the Flip Horizontally icon on the Infobar. Move the flipped line to the right to mirror the line on the left. You should have an inverted V. Select the Blend Tool (F7). Click on the bottom of the left line and drag over to the bottom of the right line (or vice versa if you prefer) to create a blend. Change the number of Blend Steps on the Infobar to 1 and press Enter to apply the change. Arrange > Convert to Editable Shapes, then Arrange > Ungroup. Delete the right line. Change the Width of the remaining center line to 8pix as shown above right in green.
|
|||||||||
|
|
|||||||||


