 |
 |
||||||||
| 0 1 2 3 4 5 6 7 8 9 10 11 Download Zipped Tutorial | |||||||||
|
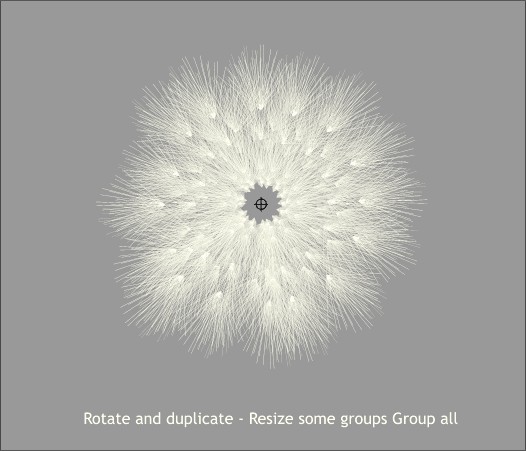
Click twice on the group to enable rotate/skew mode. Drag the Center of Rotation cross hair down to just beyond the bottom of the group as shown above. Rotate and duplicate the Groups around until you have a rounded shape. Randomly select some of the groups and resize the groups so the shape appears more random. TIP: Xtreme 3.2 and Xtreme Pro 3.2 users can rotate and scale at the same time. Drag the Center of Rotation circle and cross hairs in rotate/skew mode. Click on the selection once more to return to scale mode. Place the cursor inside and of the four corner boxes and drag with the right mouse button. This automatically rotates a duplicate copy. Use the left mouse button to scale the groups then rotate again with the right mouse button. Group all (Ctrl g).
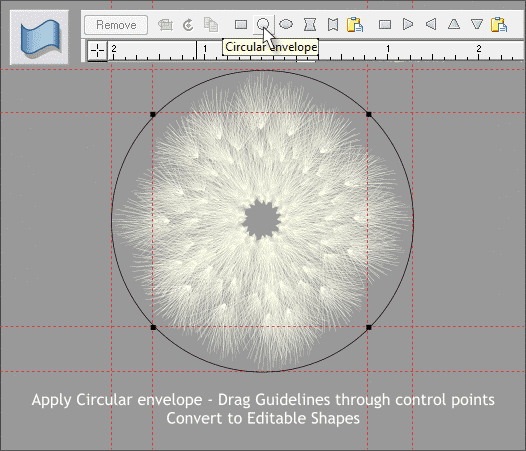
Select the group with the Mold Tool (Shift F6). Click the Circular Envelope icon on the Infobar. With the envelope still selected, drag guidelines from the screen rulers (Ctrl L to display rulers) to align with the edges of the circle and also through the 4 control points as shown above. From the Arrange menu, select Convert to Editable Shapes. NOTE: Frequently in this tutorial, you will be asked to Convert to Editable Shapes. The reason for this is many of Xara's tools create "Live" effects. This means the effect (in this case the envelope) can be edited again and again. Even after the file is saved. But there are times when we want to do a different kind of editing and in this case we turn off the Live effect by converting it to editable shapes.
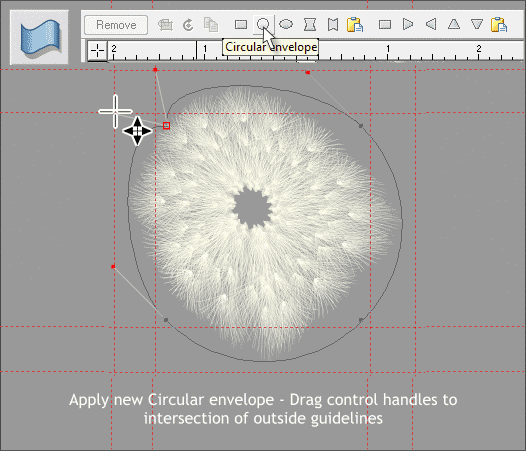
Apply a new Circular envelope. Click the upper left hand control point (shown above on the left). Drag the solid red squares at the end of the control handles to the intersection of the outer guidelines as shown.
|
|||||||||
|
|
|||||||||


