 |
 |
||||||||
| 0 1 2 3 4 5 6 7 8 9 10 11 Download Zipped Tutorial | |||||||||
|
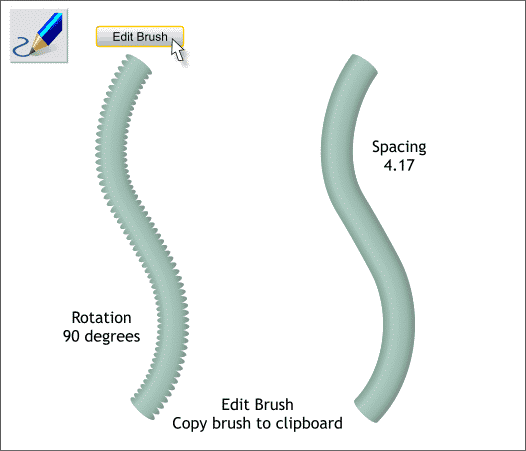
Press the Edit Brush button. In the Rotation tabbed section, change the Rotation setting to 90 degrees (shown on the left). In the Spacing tabbed section, move the Spacing slider all the way to the left to about 4.17 (shown on the right). Copy the edited brushed path to the clipboard (Ctrl c). To do this, just select the edited brushed path with the Selector Tool (the arrow pointer) and select Copy from the Edit menu or press Ctrl c. Xara copies the actual brushed path as well as its attributes you just edited to the computers RAM memory (the Clipboard).
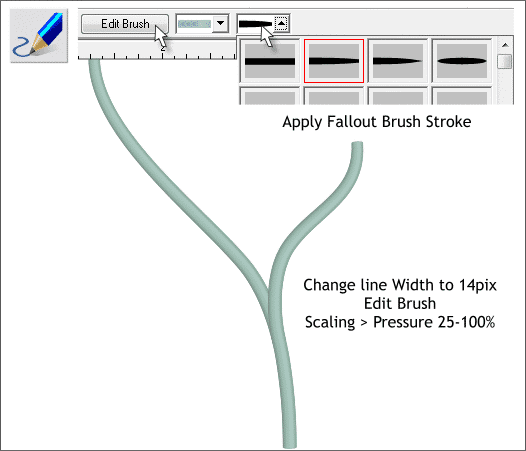
Select both stem lines and Edit > Paste Attributes or Shift Ctrl a. The attributes from the brushed path you copied to the clipboard are applied to the two stem lines. Change the line Width for the two stems to 14pix. With both stem lines and the Freehand and Brush Tool still selected, open the Select an Existing Stroke Shape drop down list and select the Fallout brush stroke (shown above, top right). Press Edit Brush again. In the Scaling tabbed section, move the Pressure slider to the right to about 25-100%. This accentuates the tapered stroke shape. NOTE: If one or both of your lines are tapering in the wrong direction, (heavy side up), switch to the Shape Editor Tool (F4)and press the Reverse Path icon on the Infobar. The direction of the path is determined when you create the path.
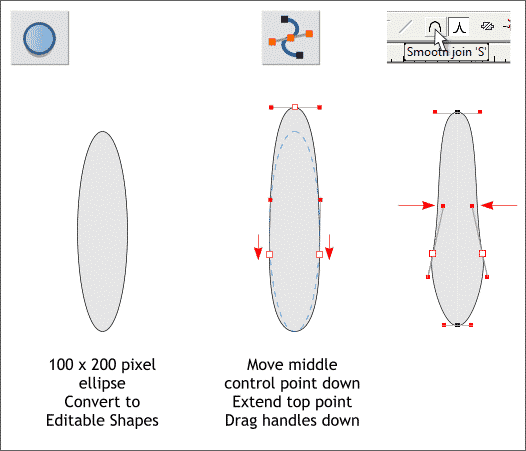
Using the Ellipse Tool (Shift F4), create a tall narrow ellipse to the size shown above. Arrange > Convert to Editable Shapes. With the ellipse selected, switch to the Shape Editor Tool (F4). Select the two middle control points and move them down about 10 pixels. Select the top center control point and move it up about 20 pixels. Select the two center points you just moved downwards. On the Infobar click the Smooth Join icon. Drag the red top control handles towards the center as shown. Save your drawing and take a short break to rest your eyes. I can see you through the tutorial screen so no cheating.
|
|||||||||
|
|
|||||||||


