 |
 |
||||
| 0 1 2 3 4 5 6 7 8 9 10 11 12 Download Zipped Tutorial | |||||
|
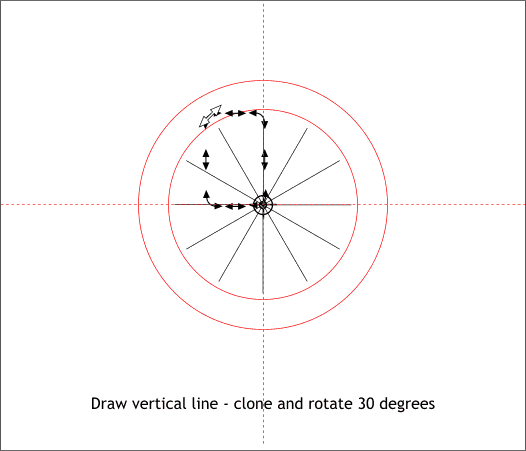
Select the large and middle sized duplicate circles. Using the Shape Editor Tool, or the Pen Tool, draw a vertical line from the center of the smallest circle that extends almost to the top of the smaller circle. TIP: Select the circle with the Circle Tool. A cross hair X will appear in the center of the circle. Drag a horizontal and vertical guideline from the screen rulers (Ctrl L to display rulers) through the cross hairs. Draw your line from the intersection of the two guidelines. Click the Shape Editor Tool at the intersection of the guidelines, hold down the Ctrl key, then click and drag upwards to constrain the line to the vertical. Open the Page Options dialog (Ctrl Shift o or Utilities > Options...). In the General tabbed section set the Editing > Angle of Constraint setting to 30°. Click twice on the vertical line to enable rotate/skew mode. Drag the center of rotation bulls eye to the intersection of the two guidelines. Clone the line (Ctrl k) then hold down the Ctrl key and drag the one of the top corner rounded arrow rotation handles until the cloned line snaps into place at 30 degrees. Continue to clone and rotate until you have 12 lines as shown above. TIP: You can rotate and duplicate in one step by rotating the line then pressing the right mouse button to drop a duplicate. Continue until you have all 12 lines.
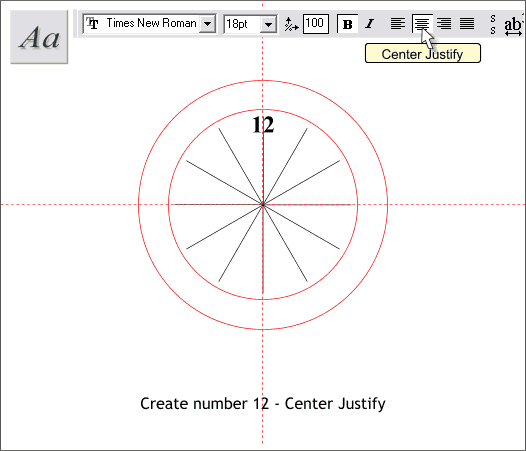
Select the Text Tool (F8) and click near the top of the center line. Click the Center Justify icon on the Infobar. Key in 12. Highlight the text (drag the text cursor across the text). Change the Size to 18pt and the style to Bold (the B icon).
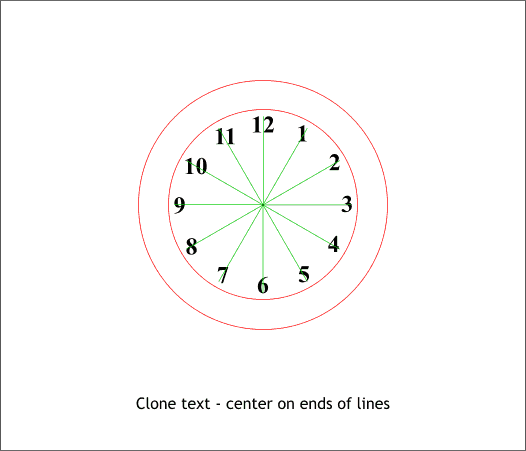
Clone the text and position the numbers at the ends of the lines. Change the numbers to 1-12 by highlighting the text with the Text Tool cursor then keying in the new number.
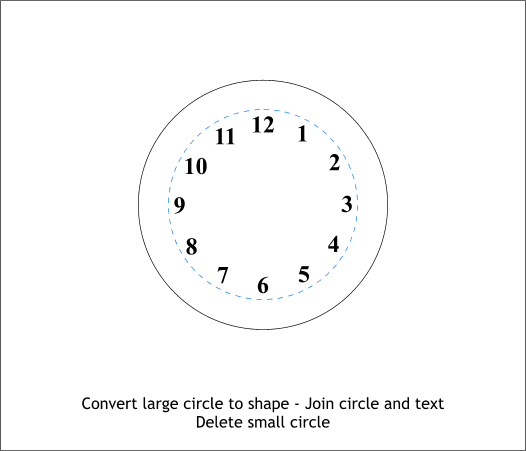
Convert the large circle to shape (Arrange menu). Select the numbers and large circle and Arrange > Join Shapes. Group the lines and move them to one side. Delete the small circle.
|
|||||
|
|
|||||


