|
|
|
As always, we will be using Pixels as our units of measure. Right click on the screen and select Page Options... from the pop up menu. In the Units tabbed section, select Pixels for the Units and 0-255 for the Color Units. In the Grid and Ruler tabbed section set the Major Spacing to 100pix (key it in exactly like this please) and the Number of Subdivisions to 10. Press OK to close the dialog and apply the changes. To see a tutorial on Xara Basics visit Workbook 20. NOTE: You will notice from time to time I apply arbitrary colors to objects. I do this to make the objects easier to see. If I do not specify a fill for an object, you do not have to apply a fill or outline color. When I show an ellipse or rectangle that has just been created, that has no fill, it is because I have set the fill to none before I exported the illustration. By default, all ellipses, rectangles and Quick Shapes have a black outline and a black fill. There is nothing wrong with your copy of Xara. Naming Conventions. I use bold face to indicate the names of tools, galleries, keyboard shortcuts, and dialogs. Items such as unnamed icons and drop down lists, which have names when you let your cursor rest over them for a moment, are displayed in italics. The Infobar is the context sensitive menu at the top of the screen and changes to reflect the options for the selected tool. Some of the tool icons have changed in Xara X1, and this may cause some confusion for new users. If you are using an older version of Xara, click here to see my Rosetta Stone for translating the old buttons into the new. New Users? I have created some quick start mini-tutorials to get you though the basics. Workbook 20, Workbook 30, and Workbook 31 cover the main things you need to know to get started. |
|||
|
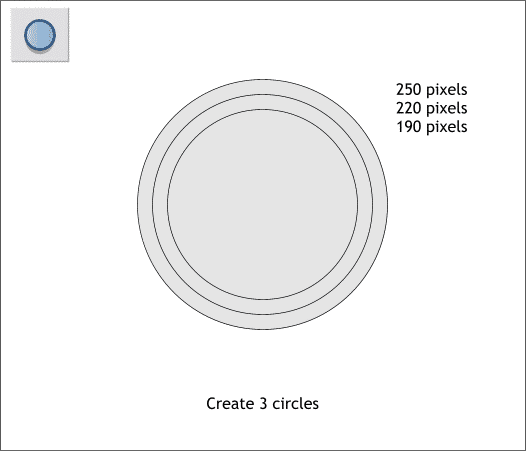
Using the Ellipse Tool, hold down the Ctrl key to constrain the ellipse to a circle and draw three circles to the sizes shown. TIP: Draw a circle and then change the size to the largest size on the Infobar. Clone (Ctrl k) the circle and change the size to the next size down (press Enter to apply the change). Clone this circle and change the size to the smallest size. Make 3 sets of duplicate circles (Ctrl d to duplicate) and set them to one side for the moment. We will need them throughout the tutorial.
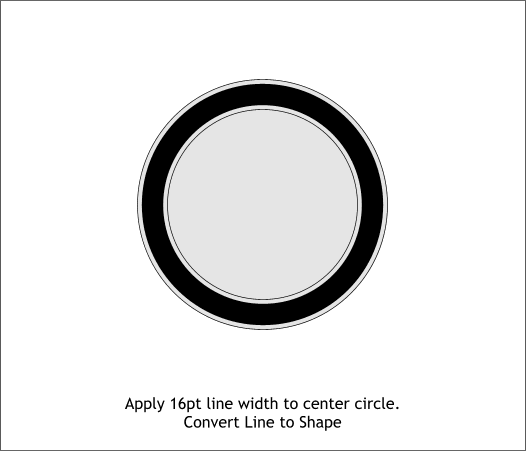
Select the center circle and change the line Width to 16pt. (Select 16pt from the drop down list of Widths on the Infobar). With the circle selected, from the Arrange menu, select Convert Line to Shape.
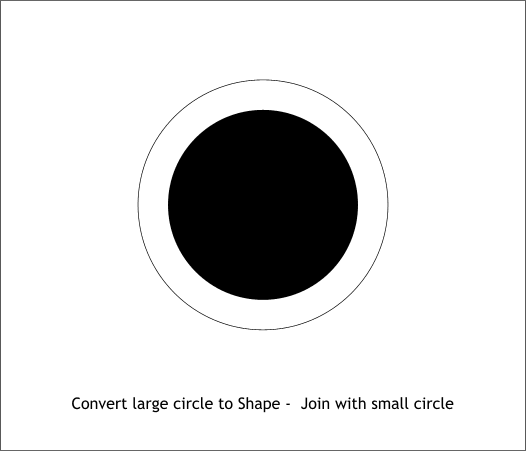
Select the largest circle and Arrange > Convert Line to Shape. Select the smallest circle and apply a solid black fill and set the outline to none (right click in the cross hatched box to the left of the screen color palette). Select the smallest and the largest circle and Arrange > Join Shapes.
|
|||
|
|
|||


