 |
 |
||||
| 0 1 2 3 4 5 6 7 8 9 10 11 12 Download Zipped Tutorial | |||||
|
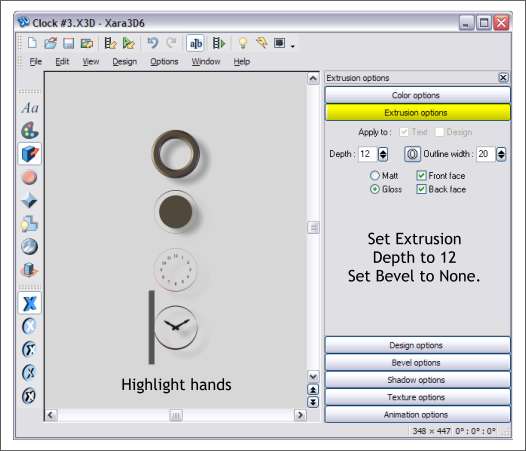
Move the cursor down and highlight the hands. Set the Extrusion Depth to 12. Set the Bevel to None. Move the cursor back up to the clock face (the circle above the numbers). Set the Extrusion Depth to 10 and the Bevel to None.
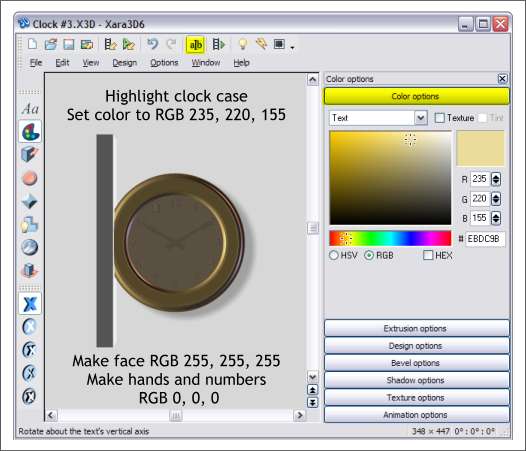
Highlight the clock case (the O-shape). Open the Color Options. Select Text from the drop down list and change the color to RGB 235, 220, 155. Move the cursor down one level and change the fill for the clock face to RGB 255, 255, 255 (White).
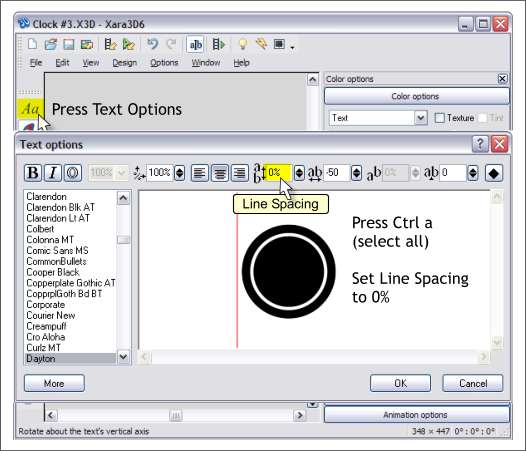
Press Text Options (or Alt t). Press Ctrl a to select all four elements. Click the arrows next to the Line Spacing window and drag the control handle to the bottom (0% ). Press OK to apply the changes and to close the dialog. This last step centers all four elements as you can see in the next illustration below.
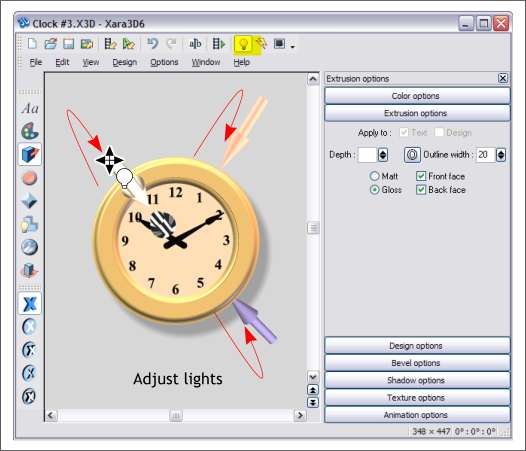
Press the Show/Hide Lighting icon (the light bulb). The three arrows represent three light sources. You can drag the ends of the arrows to adjust the light's position. (The striped arrow represents the shadow light source). Drag the white light over the 11 as shown. Drag the pink arrow almost behind the case and over the 1. Drag the purple light so that it is slightly in back of the clock as shown. NOTE: You can change the color of the light sources by double clicking on the light arrow then changing the color.
|
|||||
|
|
|||||


