Click the New Animation
button to open the animation window. We will need rulers, so if they are not present, go to the Window menu, select Bars > Rulers. If the rulers are not in pixels, repeat the steps from page 2. Click the New Animation
button to open the animation window. We will need rulers, so if they are not present, go to the Window menu, select Bars > Rulers. If the rulers are not in pixels, repeat the steps from page 2.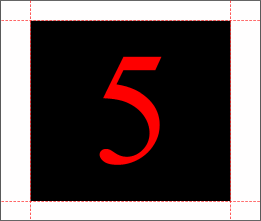
NOTE: The animation window is a separate file. You should name and save your drawing and name and save
your animation using different names.
TIP: To make it easier to distinguish
between drawing and animation, name your files something like Drawing 1.xar and Animation 1.xar. Go back to the drawing window. There
are two ways to do this, the first way is to open the Window menu and select your file from the list at the bottom of the menu. The second is the keyboard shortcut to move between pages, Ctrl - Tab.
Select the black square and the number five and copy them to the clipboard (Ctrl C). Return to the animation window and paste your image using Ctrl V or Edit > Paste. Disable
Snap to Grid by clicking the right mouse button on an empty section of the screen and selecting Snap to Grid again. Right click once again and enable Snap to Objects. (Or press the red
magnet icon on the Infobar). Drag four guidelines from the rulers and snap them to the rectangle as shown above. Click the New Frame button four times to create four new frames. Click the New Frame button four times to create four new frames.
 Press the Previous Frame button three times to go back to frame 2. Go back to the drawing page and get the rectangle with the number 4, copy it (Ctrl C
), return to the animation window and paste (Ctrl V) it into frame 2. Make sure the elements are centered within the guidelines. Repeat this process and add the last three frames. Press the Previous Frame button three times to go back to frame 2. Go back to the drawing page and get the rectangle with the number 4, copy it (Ctrl C
), return to the animation window and paste (Ctrl V) it into frame 2. Make sure the elements are centered within the guidelines. Repeat this process and add the last three frames.
 Press the Preview All Frames to open the Preview All Frames
player to play your animation or to look at the individual frames. Press the Preview All Frames to open the Preview All Frames
player to play your animation or to look at the individual frames.
That's about all there is to it. Continue on to the advanced Tutorial to add a few more elements to the animation. |