|
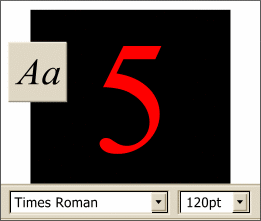 Using the Text Tool, key in the number 5.
Highlight the text by dragging the Text Insertion cursor across it, and change the color to red by clicking red on the screen palette. Change the font to Times Roman, or Times New Roman, on the Infobar
and change the size to 120 pt (points). To change the size, highlight the current point size in the text entry box, key in 120 and press Enter. Using the Text Tool, key in the number 5.
Highlight the text by dragging the Text Insertion cursor across it, and change the color to red by clicking red on the screen palette. Change the font to Times Roman, or Times New Roman, on the Infobar
and change the size to 120 pt (points). To change the size, highlight the current point size in the text entry box, key in 120 and press Enter.
|

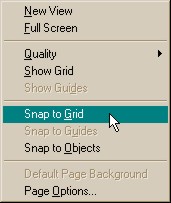 Well, almost ready to begin. But
before we get started click the screen with the right mouse button again and select Snap to Grid. This will ensure our elements will snap to the grid and be complete pixels.
Well, almost ready to begin. But
before we get started click the screen with the right mouse button again and select Snap to Grid. This will ensure our elements will snap to the grid and be complete pixels.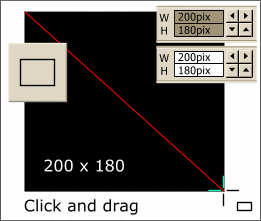 Select the Rectangle Tool
and drag a rectangle 200 pixels wide by 180 pixels tall. Apply a black fill with no outline.
Select the Rectangle Tool
and drag a rectangle 200 pixels wide by 180 pixels tall. Apply a black fill with no outline.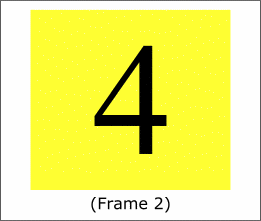 Make a duplicate of the rectangle and
number. Change the fill color for the rectangle to yellow and the fill color for the number to black.
Make a duplicate of the rectangle and
number. Change the fill color for the rectangle to yellow and the fill color for the number to black.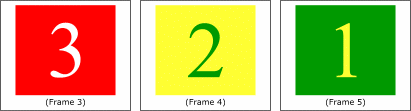 Make three more duplicates and change the numbers
and fill colors as shown here. (Don't make them half size, I've just done that to save space!) We now have five frames for our animation.
Make three more duplicates and change the numbers
and fill colors as shown here. (Don't make them half size, I've just done that to save space!) We now have five frames for our animation.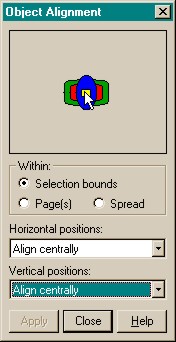 Select the first rectangle and number
and open the Object Alignment dialog (Arrange menu). Select Align Centrally from both the Horizontal Positions and Vertical Positions drop down lists and press Apply.
Select the first rectangle and number
and open the Object Alignment dialog (Arrange menu). Select Align Centrally from both the Horizontal Positions and Vertical Positions drop down lists and press Apply.

