|

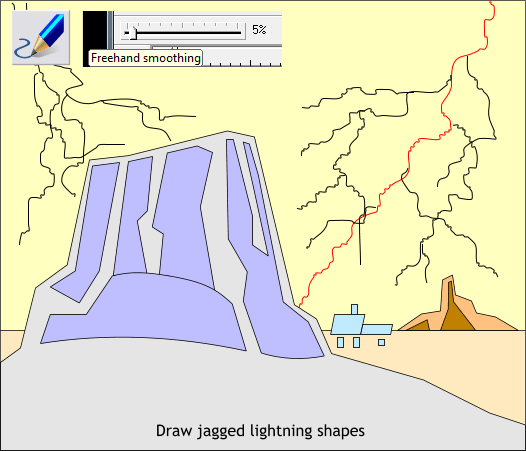
Select the Freehand and Brush Tool (F3 or N). Adjust the Freehand Smoothing slider to 5%. Lower settings make a less smooth but more
accurate line. A setting of 5% will make the lines very jagged, which is what we want.
Draw a bunch of very shaky lines to represent lightning bolts. The line shown in red will be the main bolt of lightning. The other lines should branch from the
main bolt. Draw more lines in the left corner but not quite as long.

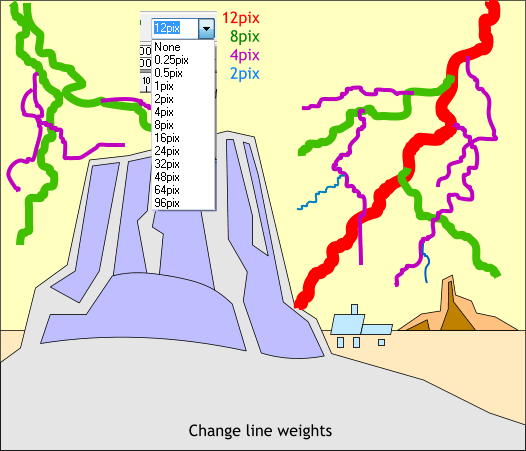
Change the Width of the bolts. Select the width from the drop down list on the Infobar or key in the appropriate number (as in the case of 12pix) and press Enter
. The line width text color corresponds to the color of the lightning bolt lines.
Change the outline colors as shown above to make the next step easier.

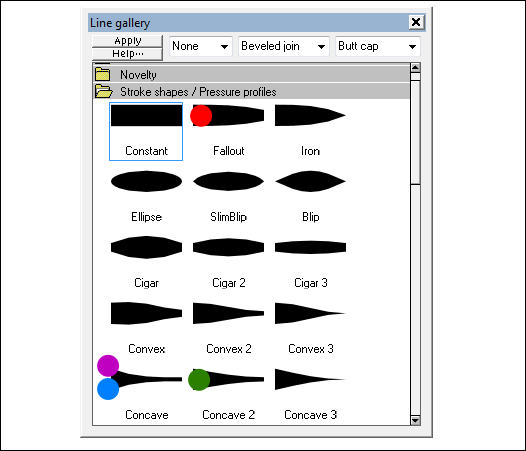
In the next step we will apply Stroke Shapes to the lines to make them taper and to achieve a more lightning-like appearance.
Open the Line Gallery (F12) then open the Stoke Shapes / Pressure Profiles folder. We will apply the stroke shapes shown above. The colors correspond to the lines.
Save your drawing so far and take a short break.
|