|

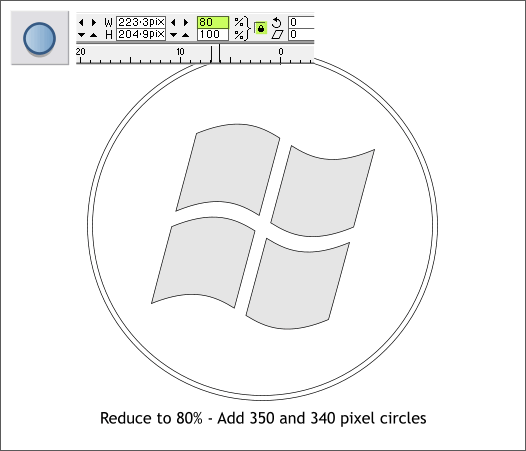
Reduce the enveloped squares to 80%. To do this, enter 80 in either of the % text entry boxes and press Enter. The small black padlock icon (Lock Aspect Ratio) should be in the down (enabled) position.
Select the Ellipse Tool (L). Hold down the Ctrl key to constrain the ellipse to a circle, and create a 340 and 350 pixel circle.
TIP: Create the larger circle. Then clone the circle (Ctrl k). Enter the new amount in the H or W text entry box and press Enter to create the
smaller circle.

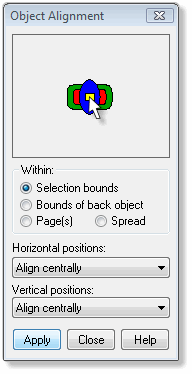
Select the two circles and the enveloped squares. Open the Object Alignment menu (Arrange > Alignment... or press Shift Ctrl L). Align the
three objects centrally and vertically.
TIP: Click in the center of the preview window to center align the objects with one click. See the bottom of this TIPS page for more one-click alignment options.

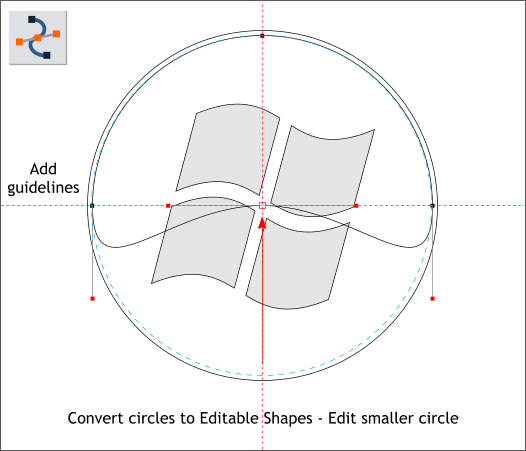
Select the smaller circle and from the Arrange menu, select Convert to Editable Shapes (Shift Ctrl s).
Drag guidelines through the horizontal and vertical portions of the circles.
Switch to the Shape Editor Tool (F4). Select the bottom center control point and drag it to the intersection of the two guidelines. Delete the guidelines.
TIP: Right click on a guideline and select Delete from the pop up menu. Or right click on either of the screen rulers and select Delete All Guidelines.
|