 |
 |
||||
| 0 1 2 3 4 5 6 7 8 9 10 11 12 Download Zipped Tutorial | |||||
|
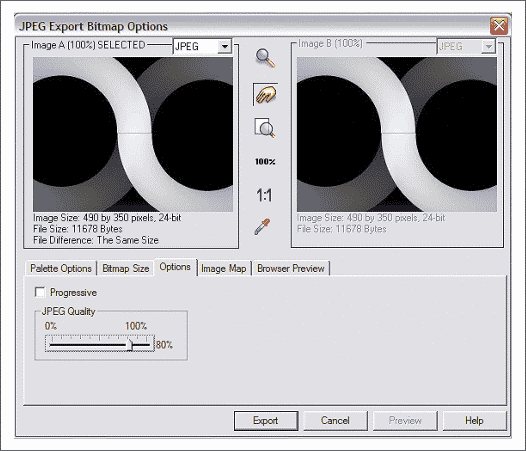
The Stereogram creation software we are going to use to create the Stereogram image can work with JPEG and Windows BMP files. We will use JPEG image format. Select the depth map image. From the File menu, select Export... In the Export File dialog, name your depth map image (I usually call mine Out but the name is not important so long as you recognize it when you see it). Select a folder or place to export your image to. From the Save as Type: drop down list, select JPEG (*.jpg *.jpeg) and press Export. In the JPEG Export Bitmap Options dialog (shown above) click the Options tabbed section and change the slider setting to 80%. Write down the image size 490 x 350 pixels . You will need these dimensions when we creatge the Stereogram. Leave the other settings as they are and press Export. NOTE: If you are planning to print the Stereogram at higher resolution, select an appropriate DPI setting in the Bitmap Size tabbed section. Usually 300dpi or larger. If you do opt for a higher resolution, write down the pixel dimensions of the image. Select the repeating panel and Export it as a JPEG and name it. I call my panels, Panel.jpg Save your drawing.
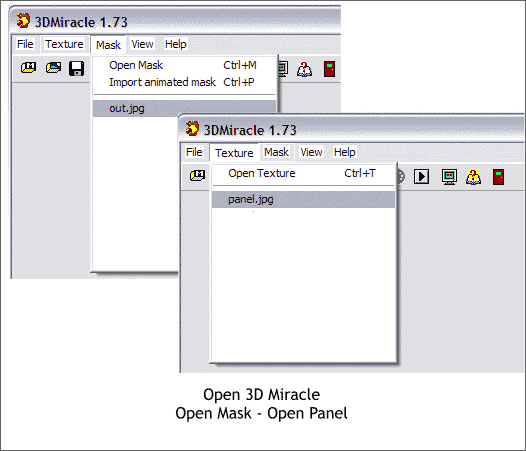
We will be using 3D Miracle to create the Stereogram. (My thanks to Soquili (Bill Taylor) for telling me about this excellent product). You can download an evaluation copy here. The download size for 3D Miracle is about 1150K. The trial version has a image size restriction of about the size of the image we are creating. To create larger images, you need to purchase the program, $24.50, US and register it. Then you can create poster sized images up to 10,000 x 10.000 pixels. I use several different programs for Stereogram creation and 3D Miracle is one of the best and easiest to use. Plus they offer a lot of free textures and 3D depth map images on their site. Download and install 3D Miracle. Open 3D Miracle. When you first open the program, you will see a Stereogram Creation Wizard dialog. This is good if you are creating a new image from scratch. But since we already have our images we do not need the wizard. (I am your wizard today!) So Cancel the Wizard dialog. From the Mask drop down menu, (Mask is what 3D Miracle calls the depth map image) select Open Mask and locate your depth map image. From the Texture drop down menu, locate and select your panel file. 3D Miracle automatically creates the image.
|
|||||
|
|
|||||

