|
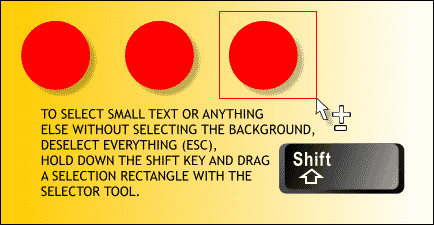
Can Atabas discovered a cool way to select anything that is over a background object without moving the background object. It’s simple. Press the Esc key to deselect everything, hold down the Shift key, and drag a selection rectangle around the object or objects you want to select. How easy is that?

Egg’s Named Color TIP: Egg Bramhill discovered this named color tip. When you alter a named color in Xara (see Editing Named Colors), all instances of that named color change too. So if you want to have many objects in the same document with more than one instance of the named color, the buttons shown above, for example do this: Copy and Paste the object you are working on to a new page, modify the colors then copy and paste from the new page back into Xara. The original named colors will remain unchanged and the new pasted named colors will be named .2. You can repeat this as many times as possible.
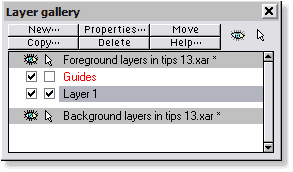
PESKY GUIDELINES TIP: If you like your Guides layer on top so you can see the guidelines while you work, but get frustrated trying to select something under a guideline, open the Layers Gallery and uncheck the edit box for the Guides Layer. You will still be able to drag guidelines onto the page (just ignore the warning dialog). And you can always delete all the guidelines by right-clicking on the screen rulers and selecting Delete All Guidelines.
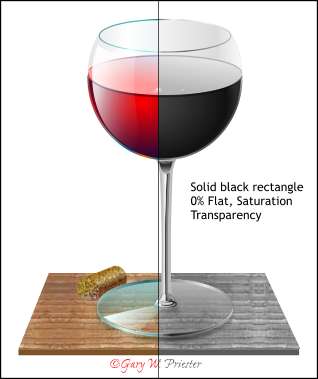
Want to turn a color vector or color vector and bitmap drawing into grayscale? Place a solid black rectangle over the objects and apply a Flat, 0%, Saturation transparency. 0% Saturation removes all the color and just leaves the grayscale color components.
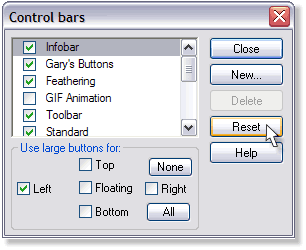
Lost Galleries Found TIP: Sooner or later we all manage to drag one of the galleries off the page where it cannot be found. To bring the missing gallery back to where it should be, go to the Window menu and select Control Bars... When the Control Bars dialog opens, click Reset. What could be easier. NOTE: If you have created any custom button or tool bars, these will be lost but it is a small sacrifice to have your house back in order.
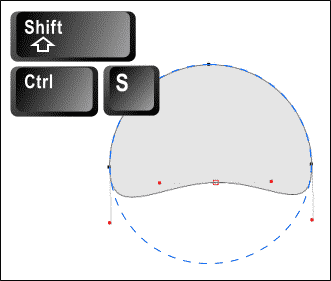
Shift Ctrl s is the keyboard shortcut for Convert to Editable Shapes. Sally Bode has discovered if you can hold down these three keys while you draw an ellipse, rectangle, or QuickShape, the shapes you draw will be converted to editable shapes at the same time. This is a time saving step if you want to edit the shapes immediately with the Shape Editor Tool (F4).
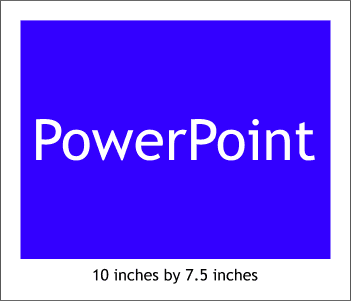
PowerPoint TIP: Stephen Robinson suggests: Create a good illustration in Xara on a 7.5" by 10" page and export it as a JPEG, it fits on one PowerPoint slide exactly (no loss of resolution due to resizing or funny side effects).

Related TIP: Not everybody works in inches. So, here’s what you can do to convert Stephen’s rectangle to your units preference. Make sure your units and ruler settings are configured to your units of choice (let’s say Pixels for example), draw a rectangle to any size, do not switch tools. In the Width text entry box, key in 10in (just like that with no space) in the Height text entry box key in 7.5in and press Enter. The rectangle’s dimensions will automatically be changed to your units of choice, in this example, 960 x 720 pixels.
Further Related Units TIP: Here are the Xara Defaults Units:
- pix Pixels (1/96 inch)
- mm Millimeters
- cm Centimeters
- m Metres
- in Inches
- ft Feet
- yd Yards
- pt Points (1,000 mp or 1/72 inch)
- pi Picas (12,000 mp 1/6 inch)
- mp Millipoints (1/72,000 inch)
- mi Miles
- km Kilometers
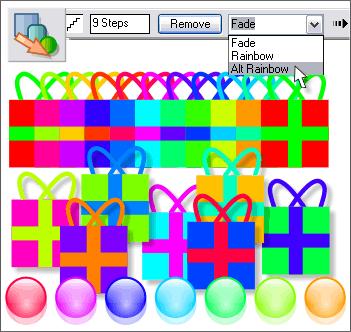
Quick Colorful Copies - Stephen Robinson recommends this quick method for producing a series of colorful copies. Create an object, such as the gift box, or colored spheres shown above, group all the objects (for example, box, ribbon, bow), make a duplicate, and create a blend using as many steps as you want copies. From the Color Blend Effects drop down list, select Alt Rainbow. Convert the Blend to Editable Shapes (Arrange menu) and Ungroup.
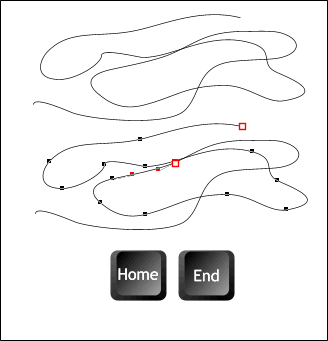
Finding a Broken Control Point TIP: dvector recently asked if there was a way to locate a broken control point on a path. One way is to select a section of line and change the outline color. But sunland, suggested selecting the line segment, switching to the Shape Editor Tool, selecting any control point and pressing the Home or End key on your keypad to find the beginning and end of any line segment. The selected control points will change to a red outline square.
Egg’s Change Case Discovery TIP: Xara’s Help files suggest that you can change a characters case (uppercase or lowercase) by placing the Text Tool cursor to the left of the character whose case you wish to change, and pressing Ctrl W to alter the case. But in response to a recent request from Erik (EJ) in the Xara X Conference on TalkGraphics.com requesting a way to change the case on an entire paragraph, Egg Bramhill discovered you can hold down the Ctrl key and press and hold the W key. The text cursor will zip through the text changing case as it goes. To change the caps back into lowercase, do the same thing.
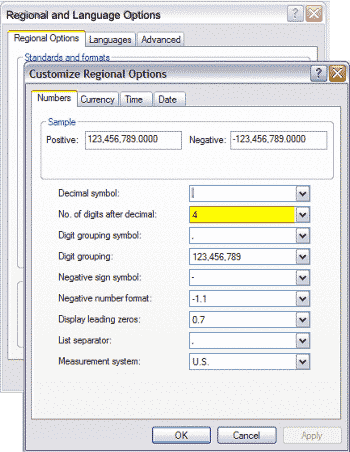
Not so round numbers TIP: Many times we need to express a number in more than 2 decimal places. But if you enter 0.125 (1/4 inch) for example, Xara rounds this off to .13. Phil M, one of the Xara development team has this answer. The problem lies with Windows in general and not with Xara X. To specify numbers in more than 2 decimal places:
- Open Windows Control Panel
- Open Regional and Language Options
- In the Regional Options tab click Customize...
- Set the "No. of digits after decimal" to 3
- Click OK and OK again
Now start up Xara X. You should find all your measurements displayed to 3 decimal places.
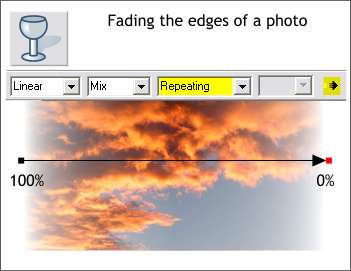
John Rayner’s Faded Photo Edge TIP: In response to a question by Mike 1 in the Xara X Conference, John Rayner offered this simple solution for fading the edges of a photo. Select the photo with the Transparency Tool. Click on the left side and drag to the right edge while holding down the Ctrl key to constrain the direction to horizontal. Select Repeating from the Transparency Tiling drop down list. Reverse the starting and ending transparency. If you want less fading, click the Profile arrow icon on the Infobar and apply a Profile 1 preset profile.
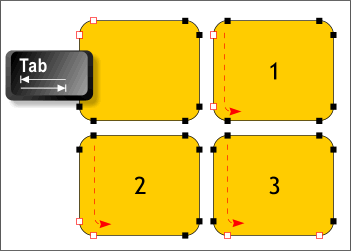
Tabbing through 2 or more control points - Not sure how you would use
this, but if you select 2 or more control points with the Shape Editor Tool,
then press the Tab key, the selection moves in an anti clockwise direction.
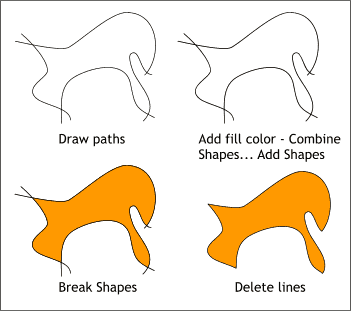
Gail Robertson offers this nifty tip for creating a filled shape using overlapping paths. Draw several paths and let the ends overlap. Select the paths and Arrange > Combine Shapes... Add Shapes. Add a fill color. Then Arrange > Break Shapes. Delete the overlapping lines. Results: a shape that is now a closed path and to which fills may be applied.
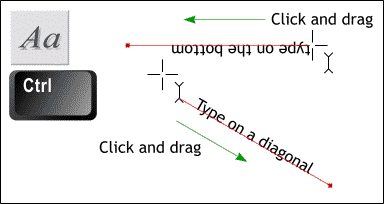
Availor recently discovered that you can create text on an angle or even upside down when you click and drag the text cursor to create “Column” text. Click and drag in any direction to create angled text. Hold down the Ctrl key and the angle will be constrained. The text radiates out from the point on the screen where the Text Tool cursor was clicked and extends for 360 degrees.
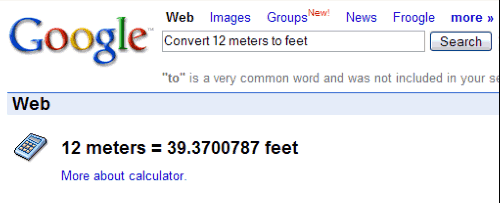
Richard from Rutland, England has this terrific TIP for converting from one unit of measurement to another: Google will convert units. Just type something like: “Convert 12 metres to feet” in the search box and Google comes up with:
12 meters = 39.3700787 feet. This is very handy and works with other units and types of calculation as well.
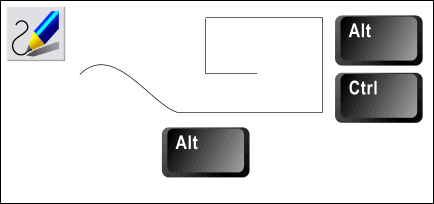
Availor offers this TIP for drawing straight lines and right angles with the Freehand and Brush Tool. To draw a straight line while drawing with the Freehand and Brush Tool, hold down the Alt key. To draw lines at right angles, to create a square or rectangle, for example, hold down the Alt and the Ctrl keys.
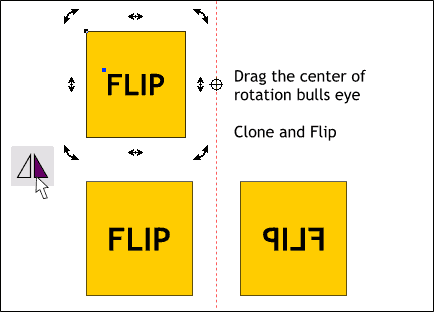
Bill Taylor (Soquili) came up with this cool way to flip a selection from a specific central point. Drag a guideline where you want the flip point to be. Click twice on your selection to enable rotate/skew mode. Drag the center of rotation bulls eye to the guideline. Clone the selection (Ctrl k) and press the Flip Horizontally icon on the Infobar.
 You can also use the Set Origin Position icon on the Infobar to determine at what side or corner of a selection an operation will be performed. To flip a selection from its right side, press the right center square on the Set Origin Position icon and then press Enter. This works with scaling and rotation operations as well. You can also use the Set Origin Position icon on the Infobar to determine at what side or corner of a selection an operation will be performed. To flip a selection from its right side, press the right center square on the Set Origin Position icon and then press Enter. This works with scaling and rotation operations as well.
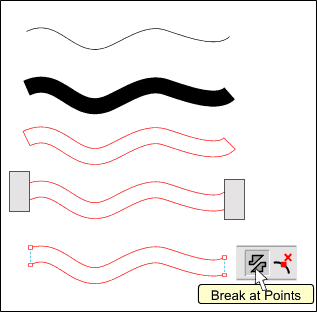
Dave Montgomery came up with this clever TIP for creating parallel lines. Create your line. Increase the line width to the space you want between the two lines. Convert the Line to Shape (Arrange menu). Use a rectangle or line to slice off the ends of the shape. Select the end control points with the Shape Editor Tool and use the Break at Points icon on the Infobar to break the control points. Delete the ends.

|