

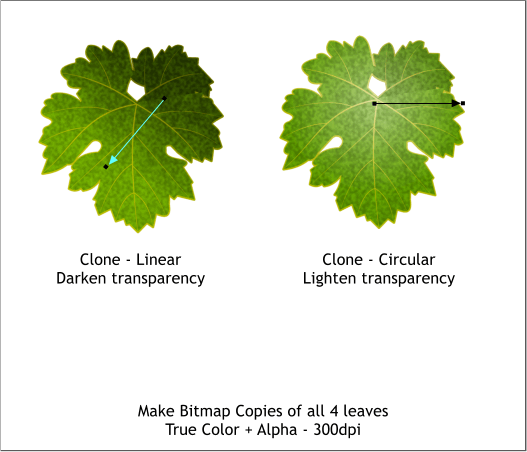
 Clone the remaining two leaves and apply the transparencies shown.
Marquee select (the proper name for dragging a selection rectangle)
each leaf and make Bitmap Copies, True Color + Alpha, and 300dpi.
We’ll use these bitmap copies to complete the illustration.
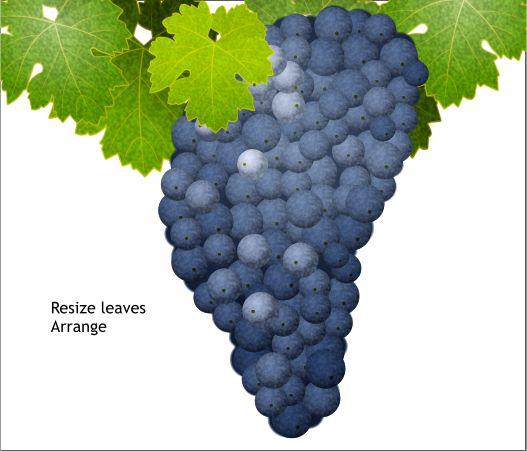
Resize the leaves and randomly rotate them. The lighter leaves are
newer and will be smaller. Bring the smallest and greenest leaf to the
font (Arrange > Bring to Front). This is starting to look pretty good.
And we could stop right now. But are we going to? Need you ask?
We need to create a branch (called a shoot, as it grows from the main
trunk of the vine). To do this, we’ll create a custom brush so we can
have a curved shoot that varies in width.
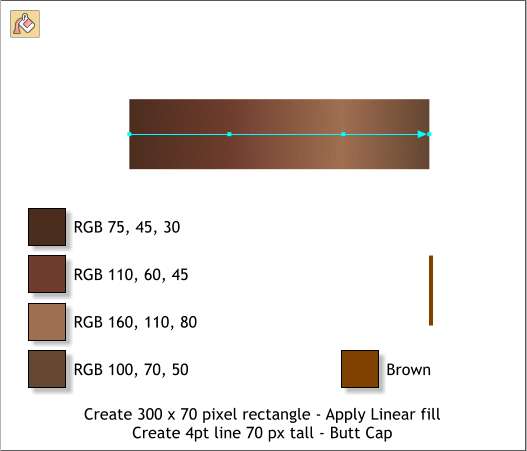
Create a rectangle to the size shown. We will make this smaller later.
Select the Fill Tool (g) and apply a Linear fill. Double click on the fill
path arrow to add two new colors. Edit the colors and new color
positions as shown.
TIP: To create an interactive Linear fill, click on the rectangle
with the Fill Tool, then drag from one corner to the other. Hold
down the Ctrl key as you drag to constrain the angle of the fill.
This same technique works with the Transparency Tool as well.
Select the Straight Line Tool, and create a vertical 4pt line the same
height as your rectangle. Apply a Brown fill from the screen palette.
Open the Line Gallery (Ctrl F9) and change the Line Cap to Butt Cap.
Call me juvenile but the term, butt cap always makes me giggle.
Duplicate (Ctrl Alt d) the brown line and place one line at each end of
the rectangle. Select the Blend Tool (w). Click on one line and drag
over to the other to create a blend.
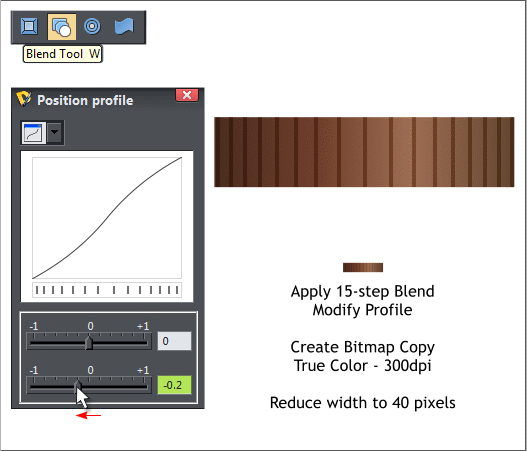
Change the number of Blend Steps to 15 and press Enter to apply the
change. Click the Position Profile arrow icon (the first arrow icon).
Move the bottom slider to -0.2. This spreads the lines out more from
the center and gives the appearance of roundness.
From the Arrange menu, select Create Bitmap Copy.... Use True Color,
and reduce the width to 40 pixels.
