


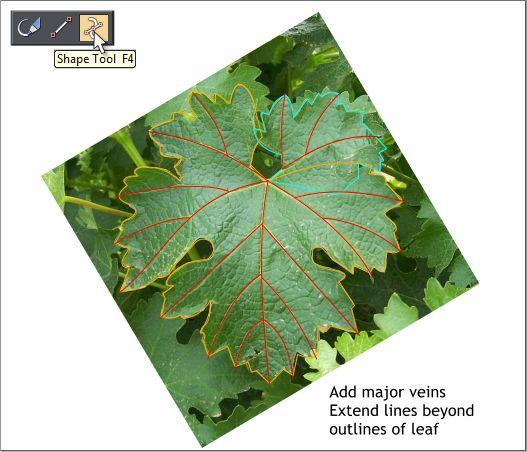
 When you have your two filled shapes, the next step is to create the
veins that run through the leaves. Use the Shape Tool to create a series
of individual straight lines. Curve the lines as you create them by
dragging on the line with the Shape Tool. Press Esc after each line
before starting the next line. Extend the ends of the lines a small
distance over the edge of the leaf outline.
When you have your two filled shapes, the next step is to create the
veins that run through the leaves. Use the Shape Tool to create a series
of individual straight lines. Curve the lines as you create them by
dragging on the line with the Shape Tool. Press Esc after each line
before starting the next line. Extend the ends of the lines a small
distance over the edge of the leaf outline.
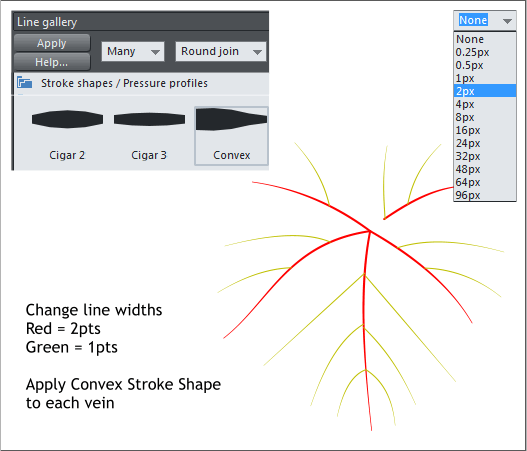 Change the widths of the veins as shown above.
Select all of the lines then open the Line Gallery (Ctrl F9). Open the
Stroke Shapes / Pressure Profiles section. Select the Convex shape
and press Apply. If your lines are tapering in the wrong direction,
select all the wrong direction lines, switch to the Shape Tool, and press
the Reverse Paths icon.
Change the widths of the veins as shown above.
Select all of the lines then open the Line Gallery (Ctrl F9). Open the
Stroke Shapes / Pressure Profiles section. Select the Convex shape
and press Apply. If your lines are tapering in the wrong direction,
select all the wrong direction lines, switch to the Shape Tool, and press
the Reverse Paths icon.
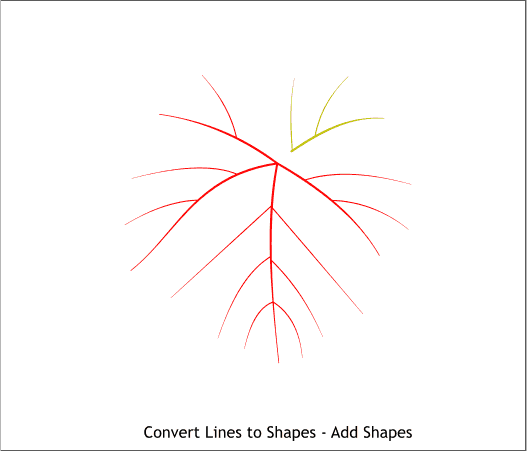
 Select all of the tapered lines shown above in red. From the Arrange
menu, select Convert Line to Shape. Then Arrange > Combine Shapes
> Add Shapes. Repeat this for the tapered lines shown in green.
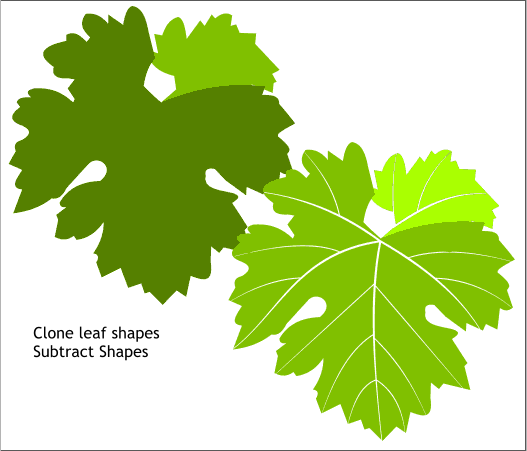
Apply a solid green fill to each leaf section. We’ll edit the actual colors
in the next few steps.
Clone the two shapes. Place the veins over each shape. Select the veins
and the shape and Arrange > Combine Shapes > Subtract Shapes (or
press Ctrl 2). This removes the vein shapes from the leaf shape.
Select all of the tapered lines shown above in red. From the Arrange
menu, select Convert Line to Shape. Then Arrange > Combine Shapes
> Add Shapes. Repeat this for the tapered lines shown in green.
Apply a solid green fill to each leaf section. We’ll edit the actual colors
in the next few steps.
Clone the two shapes. Place the veins over each shape. Select the veins
and the shape and Arrange > Combine Shapes > Subtract Shapes (or
press Ctrl 2). This removes the vein shapes from the leaf shape.