


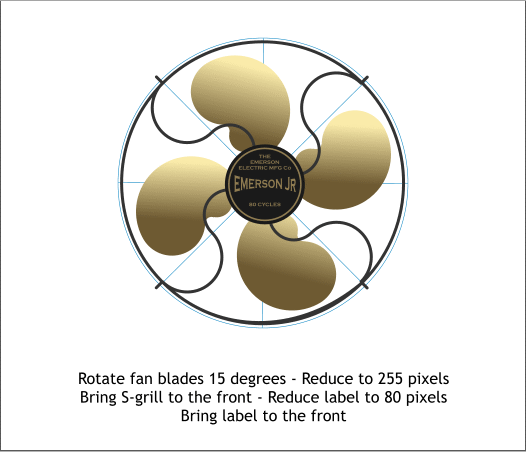
 Reduce the size of the blades group. Rotate the blades 15 degrees.
Bring the S-shapes grill and the label to the front (Ctrl f). The
converted circle with the blue lines will become a grid that will help us
bring order to the extruded chaos that is about to occur.
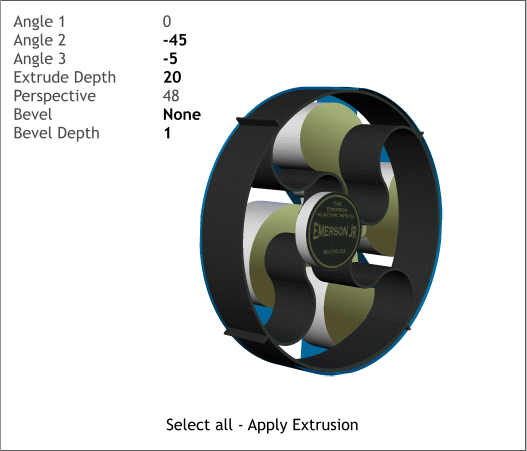
Select all these objects, select the Extrude Tool (e), and press the
Apply Extrusion 3D icon on the Infobar. Make the changes shown in my
recipe. It looks a bit of a “dog’s breakfast.” Don’t worry. We’ll clean it
all up in the next steps.
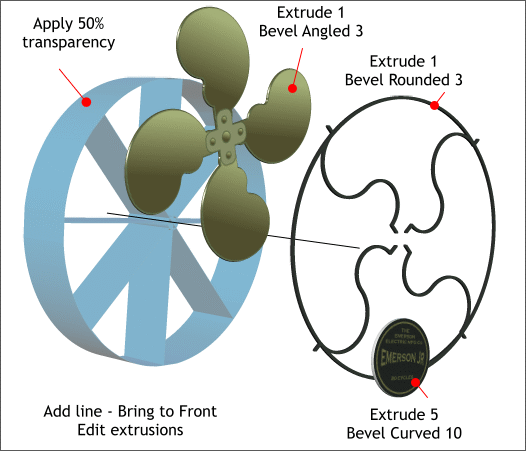
Select the objects shown and change the extrusion depth and bevel
types as shown. Select the blue guide shape and apply a 50%, Mix
transparency with the Transparency Tool (F6). With the Shape Editor
Tool, draw a line that extents outward on the same angle as the center
of the blue shape.
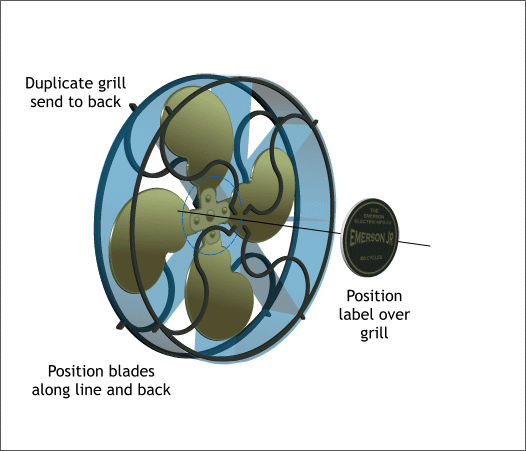
Duplicate the S-shapes grill and send it to the back (Ctrl b).
Align the S-shapes grills to the front and back of the blue guide shape.
Position the blades about half way back with the line passing through
the center of the plus shape. Finally center the label in front of the S-
shapes grill.
Delete the blue grid object or if you can’t part with it, move it off to
the side.
Reduce the size of the blades group. Rotate the blades 15 degrees.
Bring the S-shapes grill and the label to the front (Ctrl f). The
converted circle with the blue lines will become a grid that will help us
bring order to the extruded chaos that is about to occur.
Select all these objects, select the Extrude Tool (e), and press the
Apply Extrusion 3D icon on the Infobar. Make the changes shown in my
recipe. It looks a bit of a “dog’s breakfast.” Don’t worry. We’ll clean it
all up in the next steps.
Select the objects shown and change the extrusion depth and bevel
types as shown. Select the blue guide shape and apply a 50%, Mix
transparency with the Transparency Tool (F6). With the Shape Editor
Tool, draw a line that extents outward on the same angle as the center
of the blue shape.
Duplicate the S-shapes grill and send it to the back (Ctrl b).
Align the S-shapes grills to the front and back of the blue guide shape.
Position the blades about half way back with the line passing through
the center of the plus shape. Finally center the label in front of the S-
shapes grill.
Delete the blue grid object or if you can’t part with it, move it off to
the side.