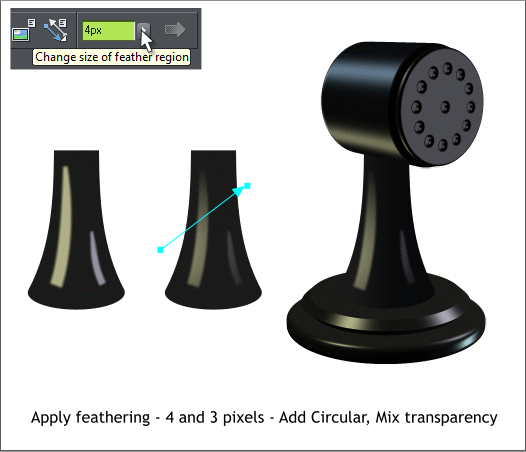


 Apply feathering using the Change Size of Feather Region slider found
on the top right area of the Infobar. This softens the edges so they are
more like the highlights on the extruded objects.
Select both shapes then switch to the Transparency Tool (F6). Click
and drag from the left upwards as shown to fade the highlights.
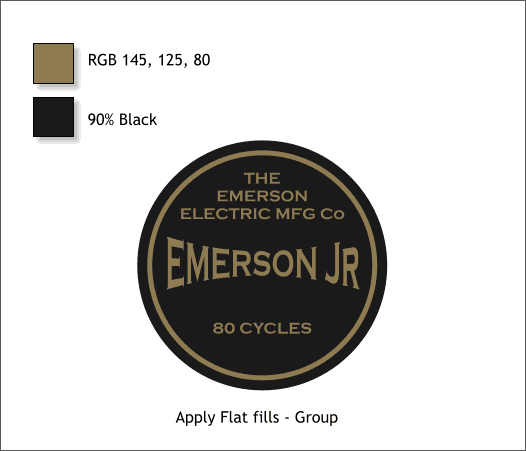
Apply Flat fills to the Emerson label. Mix the colors in the Color Editor
(Ctrl e). Select all of the label objects and group (Ctrl g).
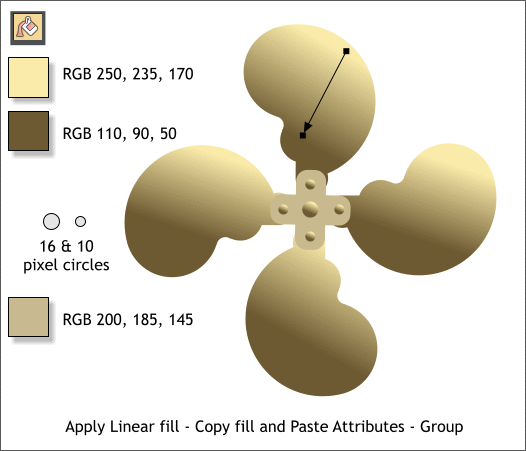
Arg! We still need a few more circles! Add these to the plus object.
Select the top blade. Select the Fill Tool (F5). Click and drag down and
left as shown. Click the top control point and change the color in the
Color Editor. Click the control point at the opposite end and change
this to the darker color. Apply the bottom color to the plus shape.
Copy the fill from the top blade (Ctrl c). One by one select the other
blades and bolt heads and Edit > Paste Attributes or press Ctrl Shift a.
Select all the blade objects and group them (Ctrl g).
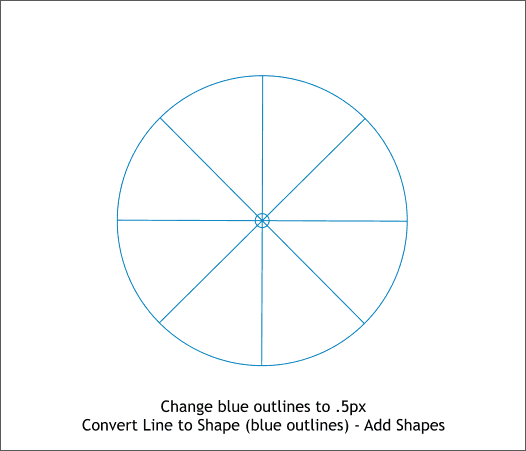
Select the circle with the four lines. Change the line color to light blue.
With the circle and four lines selected, Arrange > Convert Line to
Shape and then Arrange > Add Shapes (Ctrl 1).
Apply feathering using the Change Size of Feather Region slider found
on the top right area of the Infobar. This softens the edges so they are
more like the highlights on the extruded objects.
Select both shapes then switch to the Transparency Tool (F6). Click
and drag from the left upwards as shown to fade the highlights.
Apply Flat fills to the Emerson label. Mix the colors in the Color Editor
(Ctrl e). Select all of the label objects and group (Ctrl g).
Arg! We still need a few more circles! Add these to the plus object.
Select the top blade. Select the Fill Tool (F5). Click and drag down and
left as shown. Click the top control point and change the color in the
Color Editor. Click the control point at the opposite end and change
this to the darker color. Apply the bottom color to the plus shape.
Copy the fill from the top blade (Ctrl c). One by one select the other
blades and bolt heads and Edit > Paste Attributes or press Ctrl Shift a.
Select all the blade objects and group them (Ctrl g).
Select the circle with the four lines. Change the line color to light blue.
With the circle and four lines selected, Arrange > Convert Line to
Shape and then Arrange > Add Shapes (Ctrl 1).