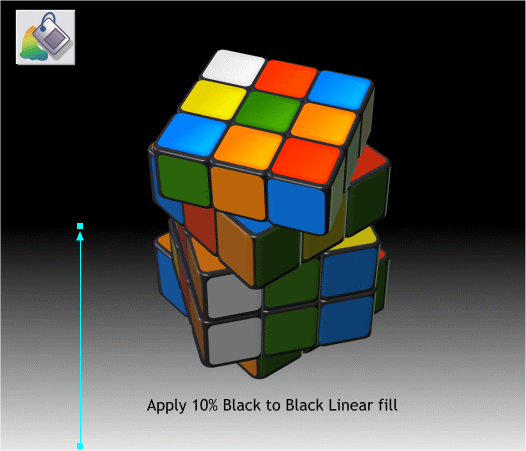

Add a 525 x 450 pixel rectangle and center it behind the objects.
Apply a Black fill.
Select the Fill Tool (F5). Click on the bottom of the rectangle to select
it, hold down the Ctrl key (to constrain the angle of the fill) and drag
upwards to about the vertical center of the rectangle.
Select the control point on the bottom with the Fill Tool and change the
start color to 10% Black.
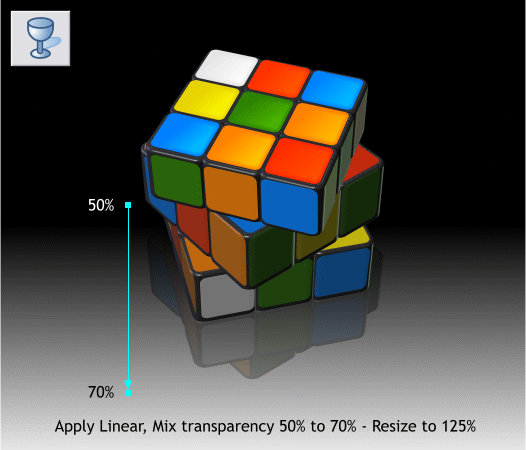
Select the Transparency Tool (F6). Click on the bitmap reflection to
select it. Hold down the Ctrl key and drag from about the center of the
page to a little distance beyond the bottom of the bitmap copy. Select
the starting control point and change the Transparency slider setting to
50%. Select the end point and change the setting to 70%. Increase the
size to 125%.
Here’s the finished illustration. I added one final touch, a subtle
highlight on the top group of colored squares. Here’s how to do it.
Ungroup the top section. Clone the top nine colored squares. Remove all
feathering and transparency.
Group the cloned squares and change the fill to white. Clone the clone
and move it about 4 pixels up and left. Select both groups and Arrange
> Combine Shapes > Subtract Shapes. This leaves a series of white L-
shaped highlights.
Add about 4 pixels of feathering.
Your questions, comments, suggestions, and corrections are always
welcome. (Well, most of the time at any rate). Use the link below to
send me an e-mail and let me know how you did.