


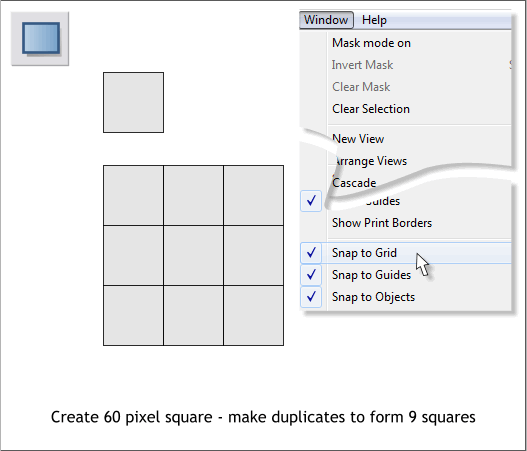
Enable Snap to Grid (Window > Snap to Grid).
Select the Rectangle Tool (keyboard shortcut M). Hold down the Ctrl
key to constrain the rectangle to a square. Click and drag a 60 pixel
square. Drag the square to the right holding down the RIGHT mouse
button. Release the right mouse button to drop a duplicate. Align the
new square next to the first square. Repeat this step until you have a
grid of nine squares.
Disable Snap to Grid.
Drag a selection rectangle around all nine squares with the Selector
Tool (F2 - the arrow pointer).
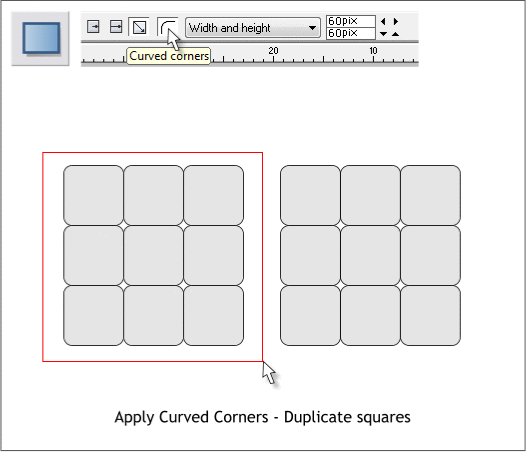
Switch to the Rectangle Tool (M). Click the Curved Corners icon on the
Infobar.
With all nine squares still selected, hold down the RIGHT mouse button
and drag a drop a duplicate set of squares.
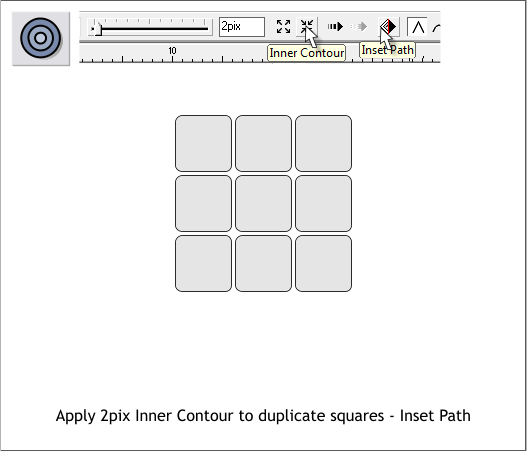
Select all nine square in the duplicate set.
Switch to the Contour Tool (Ctrl F7). Move the Contour Width slider to
2pix (or you can key in 2pix and press Enter to apply the change).
Press the Inner Contour icon, then press the Inset Path icon. The Inner
Contour icon applies the contour to the inside of the selected object.
Inset Path creates only the final single contour step, in this case nine
squares that are 2 pixels slimmer than the originals.