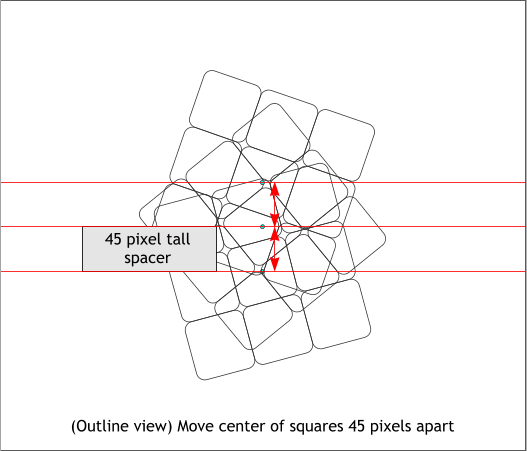
Create a rectangle that is 45 pixels tall (the width does not matter).
Switch to Outline view (move the Set View Quality slider on the Infobar
all the way to the left or select Window > Quality > Outlines).
Space the center circles for three groups 45 pixels apart using the
rectangle as a spacer as shown above.
Return the View Quality setting to Very High Quality or move the Set
View Quality slider all the way to the right.
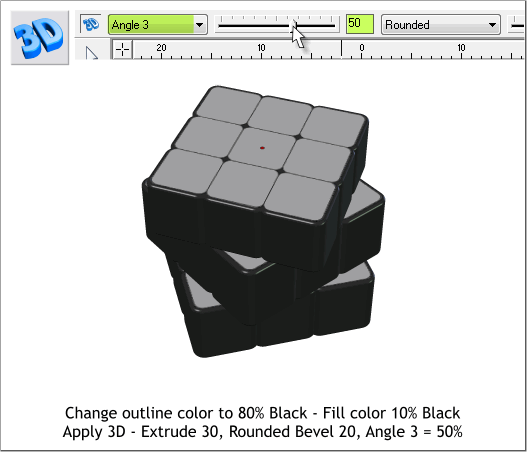
Change the fill color for the three groups of squares to 10% Black.
Change the outline color to 80% Black.
With all three groups selected, select the 3D Extrude Tool (E).
Make sure the Bevel Type is set to Rounded and Bevel Size set to 30.
From the Extrusion Parameters drop down list, select Angle 3. Change
the slider setting to 30 or key in 30 and press Enter to apply the
change. This gives us the basic shape for the three sections of the cube.
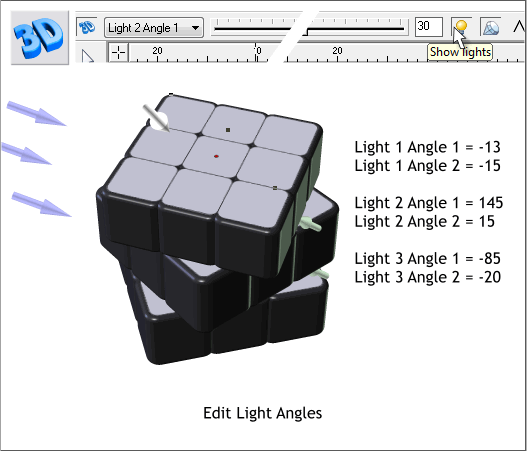
Next we need to adjust the lights. Make sure all three extruded groups
are selected. Then change each of the lighting settings as shown above.
Leave the colors as they are. If you ever want to change the colors,
however, you can edit them in the Color Editor (Ctrl e).
The outline color for any extruded shape determines the extruded side
color, in this case, dark gray. We could have colored the squares instead
of gray, but we’ll use another technique to apply the individual colors to
each of the cubes.
But first, take a short break and save your work.