


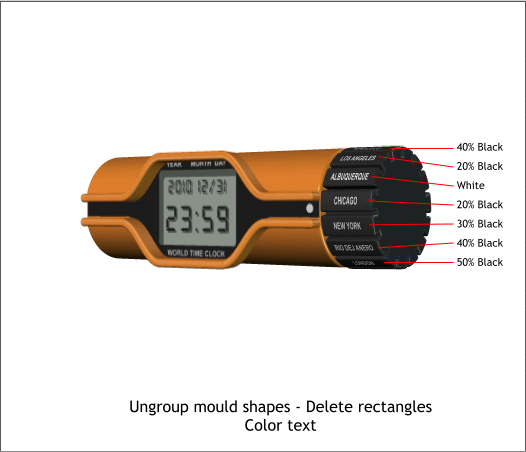
 Select each of the enveloped rectangle/text groups and Arrange >
Ungroup. Delete the rectangles but not the text. Apply fills to the city
names as shown above.
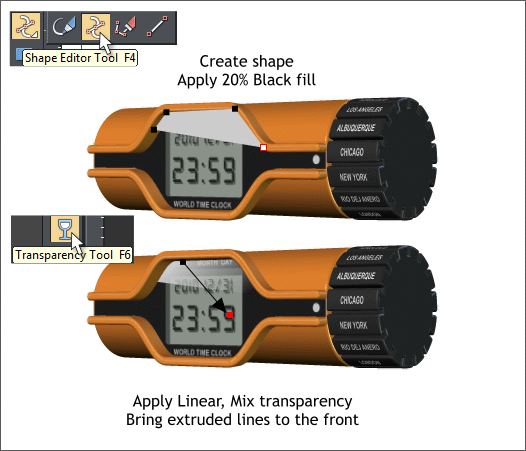
Select the Shape Editor Tool (F4). Enable the Make Line (L) option on
the Infobar. Click four control points and click the last control point on
top of the first to create a closed shape. Apply a 20% Black fill.
Select the Transparency Tool (F6) the wineglass icon. Click in the top
left area of the gray shape, and drag down and right to the digital 9 as
shown to apply an interactive Linear transparency.
Select the extruded orange lines and bring them to the front (Ctrl f).
Select each of the enveloped rectangle/text groups and Arrange >
Ungroup. Delete the rectangles but not the text. Apply fills to the city
names as shown above.
Select the Shape Editor Tool (F4). Enable the Make Line (L) option on
the Infobar. Click four control points and click the last control point on
top of the first to create a closed shape. Apply a 20% Black fill.
Select the Transparency Tool (F6) the wineglass icon. Click in the top
left area of the gray shape, and drag down and right to the digital 9 as
shown to apply an interactive Linear transparency.
Select the extruded orange lines and bring them to the front (Ctrl f).
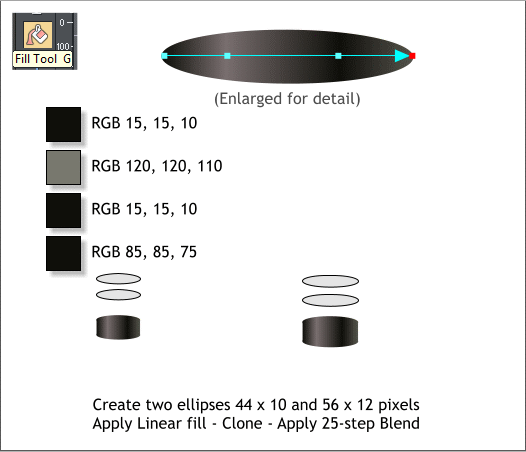
 Create two small ellipses: 44 x 10 and 56 x 12 pixels. Apply a Linear fill
as shown in the enlarged version. Zoom in close. Double click on the fill
path arrow with the Fill Tool to add the additional color points.
Clone the two ellipses and move each clone up 16 pixels.
Select the Blend Tool (w) and create two blends. Change the number of
Blend Steps to 25. (Remember to press Enter to apply the change).
Create two small ellipses: 44 x 10 and 56 x 12 pixels. Apply a Linear fill
as shown in the enlarged version. Zoom in close. Double click on the fill
path arrow with the Fill Tool to add the additional color points.
Clone the two ellipses and move each clone up 16 pixels.
Select the Blend Tool (w) and create two blends. Change the number of
Blend Steps to 25. (Remember to press Enter to apply the change).