
 WEBSITE AND WEBSITE GRAPHICS CREATED WITH XARA DESIGNER PRO 6


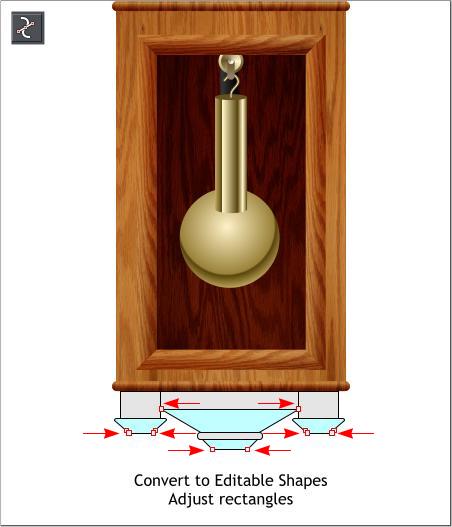
 Select the rectangles shown above in light blue and from the
Arrange menu, select Convert to Editable Shapes.
Switch to the Shape Editor Tool (F4). Select the control
points shown above as red outlined boxes, and move them in
or out as shown. You can select several points by dragging a
selection rectangle around the points with the Shape Editor
Tool or holding down the Shift key and clicking to select
several points. Use the left and right arrow keys on your
keyboard to “Nudge” the points as needed.
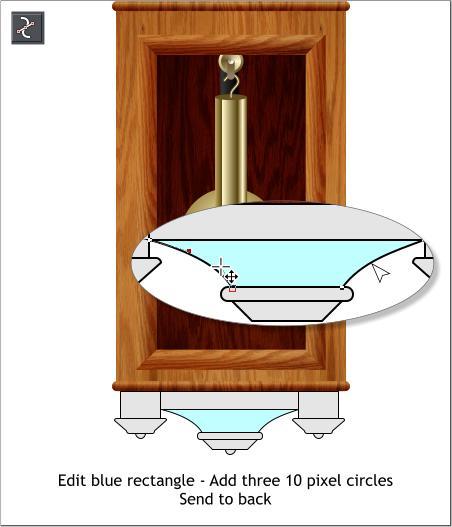
With the pale blue shape shown above selected, switch to the
Shape Editor Tool (F4). Drag inwards on the two sides to
curve the sides. Use the Bezier control handles (the small red
boxes on the ends of the lines) to fine tune your edits.
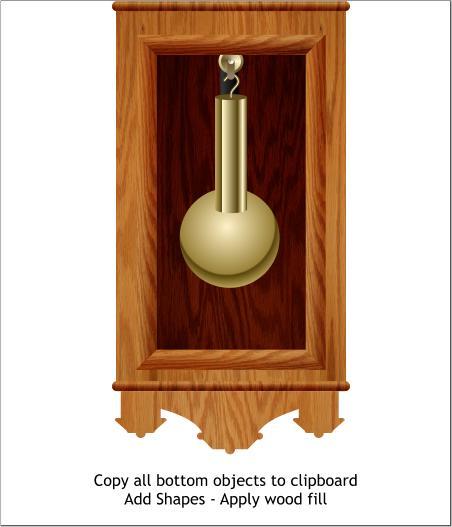
Select all of the bottom shapes by dragging a selection
rectangle around the lot (marquee selection) and copy the
shapes to the clipboard (Ctrl c or Edit > Copy).
With all the shapes still selected, Arrange > Combine Shapes
> Add Shapes or press Ctrl 1.
Open the Bitmap Gallery (F11), select the wood fill, and
press Fill. Click twice on the shape with the Fill Tool (F5) and
change the Bitmap Resolution on the Infobar to 96.
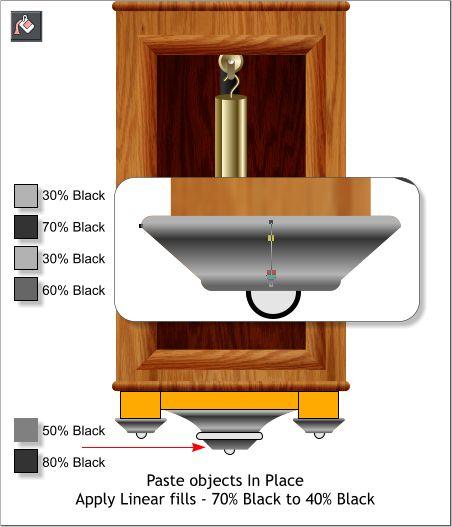
Paste the contents of the clipboard back on top using Edit >
Paste in Place. Delete the duplicate shapes shown in orange.
Apply a Linear fill to the center shape shown in the
enlargement. Copy the fill to the clipboard (Ctrl c).
Select the two outside shapes and Paste Attributes (Edit >
Paste Attributes or press Shift Ctrl a).
Select the rectangles shown above in light blue and from the
Arrange menu, select Convert to Editable Shapes.
Switch to the Shape Editor Tool (F4). Select the control
points shown above as red outlined boxes, and move them in
or out as shown. You can select several points by dragging a
selection rectangle around the points with the Shape Editor
Tool or holding down the Shift key and clicking to select
several points. Use the left and right arrow keys on your
keyboard to “Nudge” the points as needed.
With the pale blue shape shown above selected, switch to the
Shape Editor Tool (F4). Drag inwards on the two sides to
curve the sides. Use the Bezier control handles (the small red
boxes on the ends of the lines) to fine tune your edits.
Select all of the bottom shapes by dragging a selection
rectangle around the lot (marquee selection) and copy the
shapes to the clipboard (Ctrl c or Edit > Copy).
With all the shapes still selected, Arrange > Combine Shapes
> Add Shapes or press Ctrl 1.
Open the Bitmap Gallery (F11), select the wood fill, and
press Fill. Click twice on the shape with the Fill Tool (F5) and
change the Bitmap Resolution on the Infobar to 96.
Paste the contents of the clipboard back on top using Edit >
Paste in Place. Delete the duplicate shapes shown in orange.
Apply a Linear fill to the center shape shown in the
enlargement. Copy the fill to the clipboard (Ctrl c).
Select the two outside shapes and Paste Attributes (Edit >
Paste Attributes or press Shift Ctrl a).

 DOWNLOAD ZIPPED TUTORIAL


