 |
 |
 |
 |
 |
 |
 |
 |
Xara X. The Text Tool (Continued)
Amounts over 100% increase the default spacing while amount under 100% decrease the letter and word spacing. You can use the arrow buttons or enter the desired amount and press Enter.
Tracking is measured in 1/1000 of an EM or roughly the width of a capital letter M.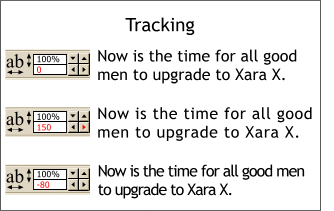 Tracking
(e) uniformly adjusts the word
and letter spacing for selected text.
This operation is useful for optically spacing several lines of text. For example, one line of text may have no decenders (parts of the characters that fall below the baseline (g, y,
p, q, etc.) while the line of text below might have lots of characters with ascenders (d, t, f, etc. The two lines might appear to have different amounts of line spacing. Adjusting the baseline shift for one of the lines can
compensate and make the lines appear to be optically spaced.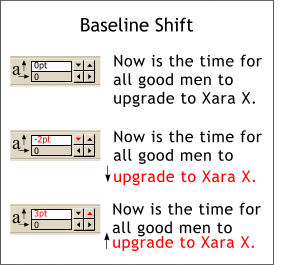 Baseline Shift (c) moves a selected line of
text, or selected characters up or down.
Most fonts have what is known as kerning pairs, pairs of characters whose spacing has been adjusted to optically equalize their
spacing. And example of this is W and e. Most fonts have a kerning pair for these characters. To make this adjustment manually, insert the text cursor between the two characters (the W and e) and press the arrow buttons to
open to close the amount of character spacing as shown above.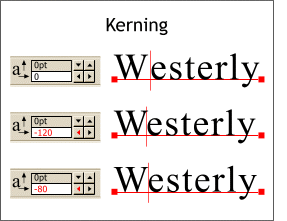 Kerning (f) adjusts the space between two
characters in between which the Text Tool cursor has been inserted.
TIP: Good character spacing will appear to have an equal amount of space between each character.
A good rule of thumb is don't exceed 15 to 20% in either direction because it deforms the text in ways the font's designer never intended. 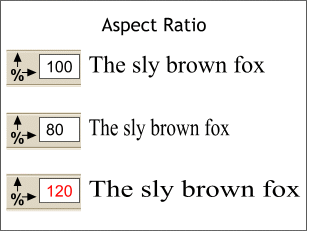 Aspect Ratio adjusts the width of the selected text. Amounts less than 100 percent result in condensed characters. Amounts greater than 100 percent result in extended characters.
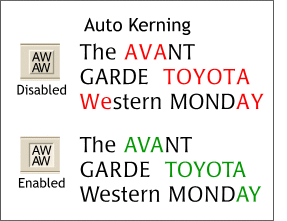 Auto Kerning adjusts the overall spacing of a selected line or column of text. Enabled by default, Auto Kerning looks for letter pairs that have uneven spacing (such as the
characters shown in red in the first example) and adjusts the spacing by tucking the characters closer together to achieve better "color".
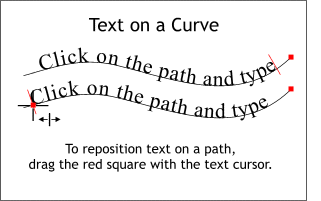 Placing text on a curve (path) in Xara is as simple as clicking the Text Tool cursor on the path and typing.
NOTE: The point on the path where the cursor is first clicked, determines the left margin. To adjust this margin, drag the small red box (at the beginning of the text) with the Text Tool cursor.
To release the text from the curve, select Remove Text from Curve from the Arrange menu.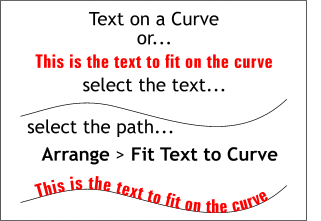 Another method for placing text on a curve involves creating the text, creating the curve, selecting both the text and the curve, and selecting Fit Text to Curve from the Arrange menu.
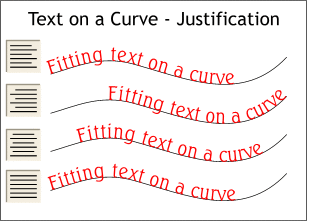 Text on a curve can be justified using the paragraph justification buttons on the Infobar. The last formatting button, Fully Formatted (justify left and right), has no effect in this case.
TIP: Often it is easier to get your type in position by dragging the red box at the beginning of the text, as opposed to using the Justification buttons.
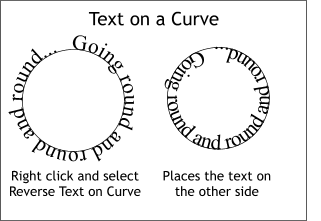 You can place text on a curve on the other side of the curve by right clicking on the text (with the Select or the Text Tool) and selecting Reverse Text on Curve from the pop up menu.