 |
 |
 |
 |
 |
 |
 |
 |
Xara X. The TIP SHEET
The two red checkers on the left are blended resulting in the blend shown in the center illustration. Moving the top slider in the Position Profile dialog
adjusts the spacing to create more accurate spacing.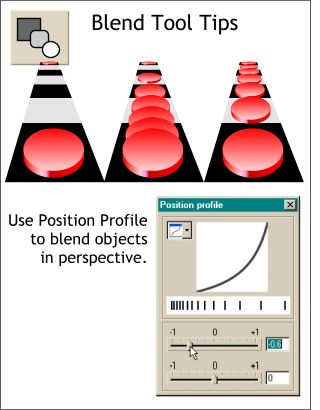 Using Use the Position Profile to
compensate for perspective foreshortening.
Using Use the Position Profile to
compensate for perspective foreshortening.
Modify the Attribute Profile to accelerate the solid filled shape.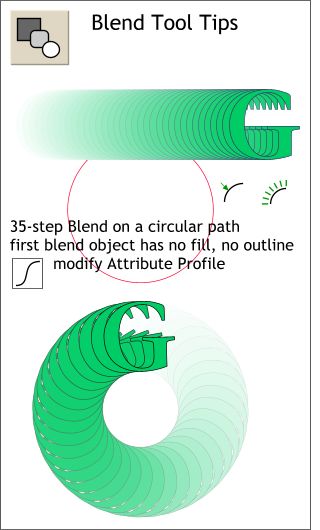 You can create an unusual effect by
blending two objects with the first object set to no fill and no outline. Bring the filled object to the top and attach the blend to a circular path (the circle needs to be converted to editable shapes (Arrange menu).
You can create an unusual effect by
blending two objects with the first object set to no fill and no outline. Bring the filled object to the top and attach the blend to a circular path (the circle needs to be converted to editable shapes (Arrange menu).
A 60-step Blend was created and applied to a g-shaped curve drawn with the Freehand Tool. The Rotate Along Curve
option was selected on the Infobar. Modifying the Position Profile created the effect of the coiled cord stretching and condensing.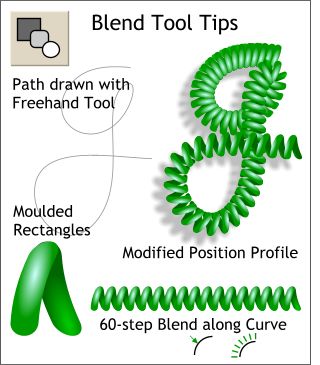 A default Mould Tool envelope was
applied to two rounded rectangles with Elliptical fills applied creating an inverted V-shape.
A default Mould Tool envelope was
applied to two rounded rectangles with Elliptical fills applied creating an inverted V-shape.
Select a logo or text and apply a 2-step contour. The one shown here has a width of 7 pixels. Adjust your width as necessary. Convert the contour to Editable Shapes and Ungroup (Arrange
menu) the three shapes. Fill the center shape white and the outer and inner shapes to your preference. Here is a quick way to create what is
called an inline and an outline.
Here is a quick way to create what is
called an inline and an outline.