 |
 |
 |
 |
 |
 |
 |
 |
Xara X. The Blend Tool (Continued)
Some times you may not want the images to be anti-aliased, when exporting a bitmap for
example, and can disable anti-aliasing thus producing the image shown top left.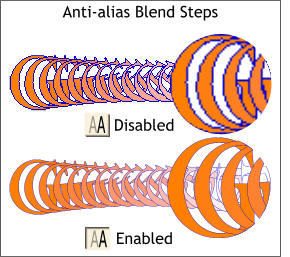 Anti-alias Blend Steps is the default setting and produces a crisp and clean image as shown in the bottom left example.
Select the blend and the path (hold down the Shift key on your keyboard while clicking to select multiple objects). Press the Blend Along Curve icon on the
Infobar at the top of the screen. Xara creates a blend using the full path. Note that all blend objects have the same vertical orientation.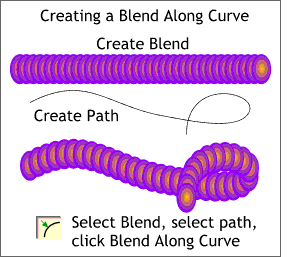 To create a Blend Along a Curve, you need
two things, a blend, and a curve (path).
When blending along a curve, the Edit Distance Between Steps icon on the Infobar
becomes activated. Selecting this option lets you specify the precise distance between blend steps.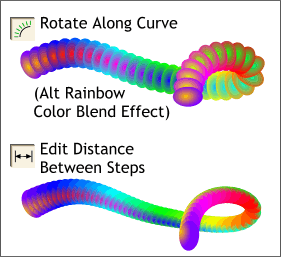 Pressing the Rotate Along Curve icon on the
Infobar, causes the blend objects to rotate in relation to the path. Note the beginning and ending objects.
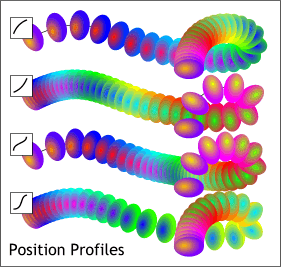 Using the Position Proiles with a Blend Along
a Curve produces some interesting effects.
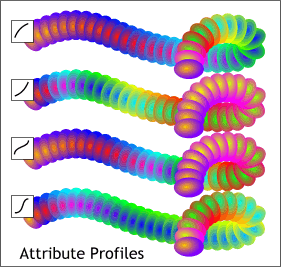 The same holds true for the Attribute Profiles.
NOTE: A blend can have Position as well as Attribute Profiles . The possible combinations are legion.
And Xara does it so effortlessly.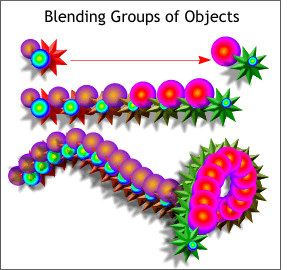 To the best of my knowledge, Xara is the only
application that can blend groups of objects containing different effects such as bevels and shadows as seen on the left.